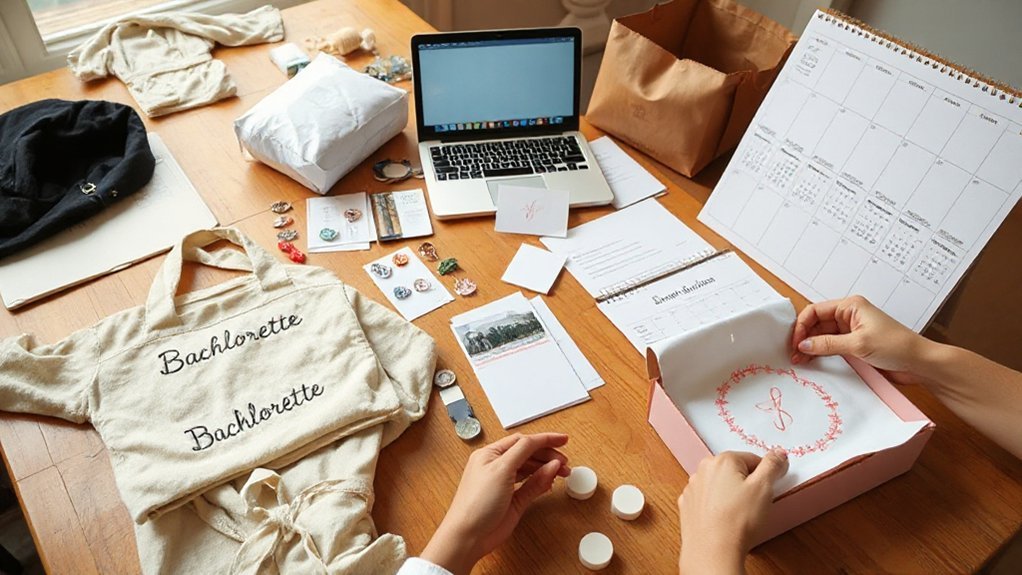
Last summer, you booked Nashville and your crew wore two-color tees with a bold inside joke, plus one metallic cowboy hat that stole every photo. You can pull that off too—pick two hero colors, keep fonts loud and clean, and choose one standout accessory, not five. Go for ringspun cotton and screen print, test at selfie distance, confirm proofs, pack backups. Want the welcome bags and hangover kits to actually get used?
Key Takeaways
- Choose a tight color palette and bold fonts; test readability at six feet for names and dates.
- Outfit the group in matching tees plus one standout accessory—mirrored sunnies or metallic cowboy hats—for instant cohesion and great photos.
- Give the bride and VIPs statement sashes, and add practical double-duty items like holo fanny packs, slim koozies, and handheld fans.
- Pick short inside-joke taglines trimmed to six words, mockup on your phone, and balance size for quick readability.
- Prioritize durable materials and vetted vendors; confirm proofs, turnaround, shipping buffers, and know last-minute DIY backups like iron-ons and sticker paper.
Theme-Ready Merch Ideas: Tees, Sashes, and Standout Accessories
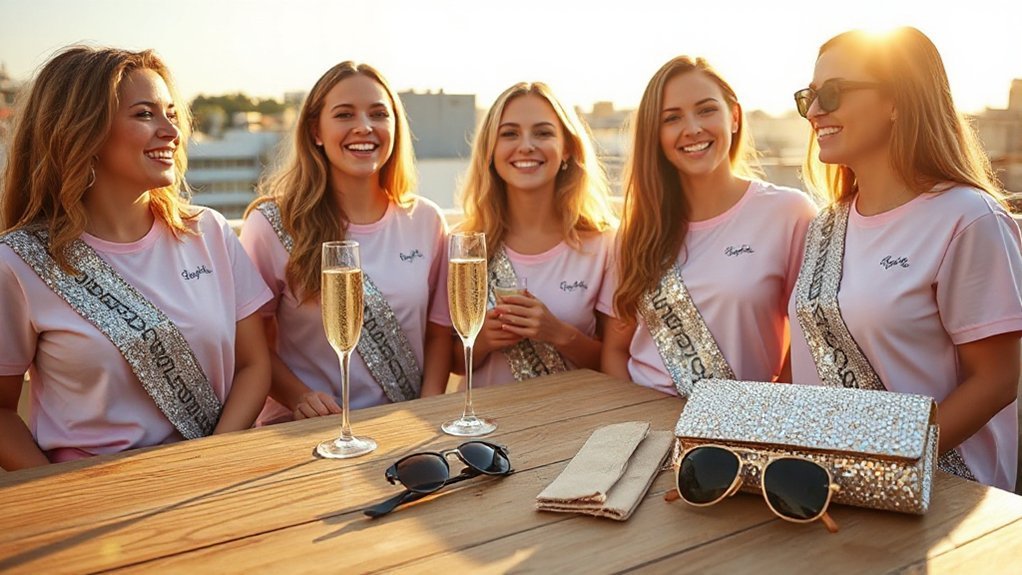
A few smart pieces can carry a whole bachelorette theme on their backs, and tees, sashes, and one or two loud accessories do most of the heavy lifting. You start with Matching Tees that nail the vibe at a glance, so the crew reads as one unit the second you step out of the rideshare, unmistakable. Layer in Statement Sashes for the bride and key players, because a clean sash directs attention without yelling, like an arrow that moves the night along. Then add standout piece everyone uses, say mirrored sunnies, metallic cowboy hats, or a light up veil that helps you find each other in a dark bar. Toss in practical bits that pull double duty, like holo fanny packs for hands free corralling, slim koozies that keep drinks cold, and handheld fans for rooftop heat. Fewer items, bigger impact, less to carry, no missed photo together.
Personalization Tips: Colors, Fonts, and Inside Jokes That Pop
Start by picking a tight color set and use it on everything, think dusty rose and rust and cream for a soft look, or black and white with a hit of neon green when you want bold, and keep that same mix on tees, sashes, cups, the whole kit. Turn a real moment into a short inside-joke tagline, like “Team Carry-On” after that airport scramble or “Spicy, Not Sorry” for the salsa queen, and keep it to three or four words so it reads fast and looks clean. Print a quick sample, hold it six feet back, and check the colors and words together, because if it’s clear from a hallway now, your photos will thank you later.
Cohesive Color Palettes
One strong color story pulls all the merch together so it looks like a crew, not a lost-and-found table. Start with two hero colors and one helper, keep them steady across tees, totes, cups, and signs. Use seasonal schemes to fit the vibe—sunset corals in summer, pine and champagne in winter—so photos feel natural, not forced. Mind contrast balance so names and dates read clean at a glance, even after a long night. Test your picks in daylight and bar light, and print samples if you can. From there, lock the rules and let the fun sit inside the frame.
- Pick a base, a pop, and a neutral; repeat.
- Swatch on screens, menus, napkins; check glare.
- Keep metallics to accents; foil walks, ink runs.
Inside Joke Taglines
How do you make a tagline that hits the group chat nerve and still reads clean on a koozie? Start with the moment you all quote, then trim to six punchy words. Use bold fonts for snap and high-contrast colors for easy reads, and let Memory triggers carry the load. Practice Context preservation with one clue so cousins don’t squint. Think place, snack, or a near miss, not the whole saga. Test it on a phone and a mockup, then shave any fuzz. Here are quick, handy jump-starts.
| Inside joke seed | Sample tagline |
|---|---|
| Spilled margarita rescue | Bride, Still Shaken, Not Spilled |
| 3 a.m. karaoke anthem | Key Change, Life Change |
| The infamous hiking detour | Left Turn, Right Crew |
| Her daily iced coffee | Caffeinated, Committed, Collected |
Quality vs. Budget: Materials, Printing Methods, and Price Points
Even if the budget’s tight, you can still pick bachelorette merch that won’t peel, pill, or sag by brunch, and it starts with knowing what you’re paying for. Start with fabric: ringspun cotton feels soft and stays neat, while cheap carded cotton goes scratchy and shrinks fast; blends add stretch and wrinkle less. Do a durability comparison in your head, like how a tote with thicker canvas outlasts a flimsy promo bag after one sandy beach day.
- Screen print for bold, flat color that survives washes, pay more up front, save later.
- DTG suits small batches with photos or gradients, costs a bit more per piece, gives detail.
- Embroidery costs most, but it looks rich and resists wear, great on hats and terry.
Price points make sense with cost transparency, you see what’s fabric, what’s ink, what’s sewing. Pay for stress points—seams, hems, cuffs—and skip gimmicks that crack.
Vendor Vetting and Timelines: Ordering, Proofs, and Shipping
Before you click “buy,” vet the shop and map the calendar so your boxes land before the bride’s playlist does. Start with receipts that matter: unfiltered reviews, real customer photos, and clear proof steps. Ask how fast they send first proofs, who fixes typos, and how many rounds you get, because two clean rounds beat six messy ones. Confirm lead times in writing, from proof approval to ship date, and pad five spare days, storms and soccer tournaments happen. Check return policies; custom usually can’t return, but good vendors promise reprints for misprints or late arrivals. Look at shipping choices, ground, express, split to two addresses, and require tracking with insurance. Ask for fabric swatches or a sample print, hex codes in, vector logos out. Get names, not just a ticket number, and an after-hours contact. Place a test order first, then scale so the run lands clean.
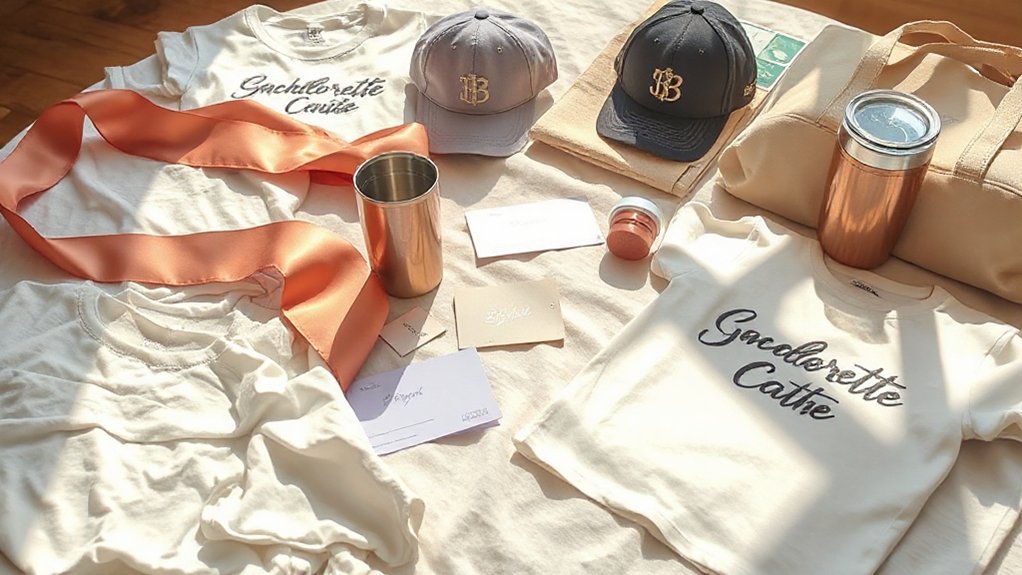
Welcome Bags and Favors: Eco-Friendly Options and Hangover Kits
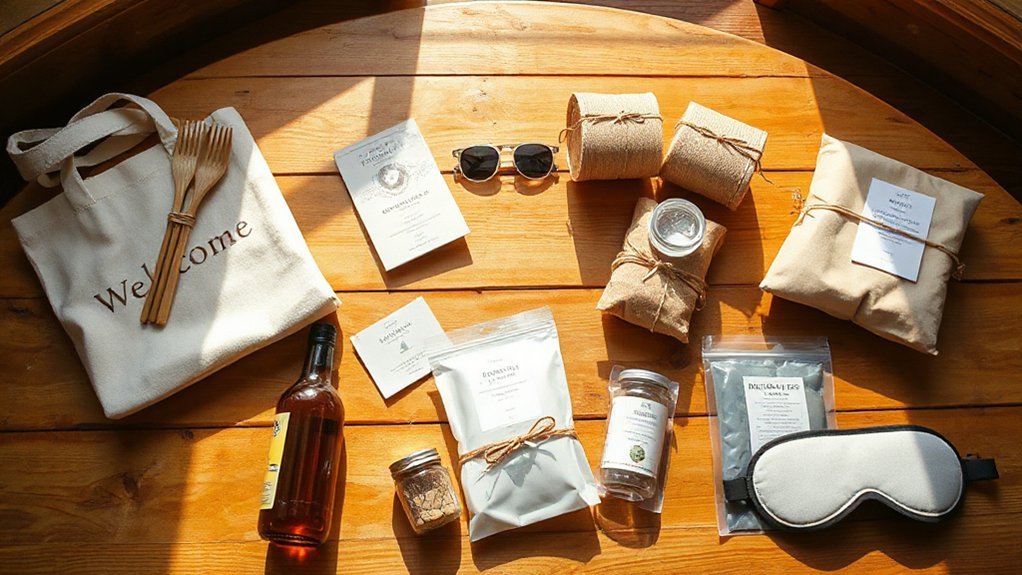
With your vendors lined up and ship dates set, it’s time to fill welcome bags that don’t junk up a landfill and still make everyone feel looked after. Choose sturdy cotton totes over throwaway plastic, and tuck in goods that get used up, not tossed. Think tea, instant coffee, a fruit bar, and a simple kit for the morning after, packed in biodegradable packaging that won’t hang around like a bad song.
- Electrolyte packets, ginger chews, and a soft sleep mask, because bright rooms happen.
- Travel-size SPF, lip balm, and a foldable sun hat for patio brunch and pool time.
- A small reusable bottle with a map to your hydration stations, plus a note on where to refill.
Add a handwritten welcome card that names each guest, and you’ll set a kind tone fast. Keep colors bold, labels clear, and directions short, and group moves smoother, no fuss.
Last-Minute Solutions: Quick-Print, DIY Hacks, and Backup Plans
When the clock runs hot and your merch isn’t here yet, you pivot fast and make it cute anyway. Swing by a copy shop, quick‑print bold names on heavy cardstock, trim with a box cutter, and punch holes for tags and drink charms, done. Grab iron‑on paper and a cheap tee stack, mirror the file, press, and you’ve got matching tops before the rideshare arrives. Sticker paper turns any plain cup, phone case, or mini bottle into “bride squad” in five minutes flat. Toss an Emergency sewing kit in your bag; a loose strap, a fallen button, or a quick sash hem won’t slow you. If shipping fails, raid the craft aisle: bandanas, ribbon, and safety pins build instant flair with a wink. Save your sanity with a shared QR code and Backup playlist, plus digital itineraries, so even when plans wobble, the party keeps its beat strong.