If you purchase through them, we may earn a small commission at no extra cost to you.
See our Disclaimer for full details.
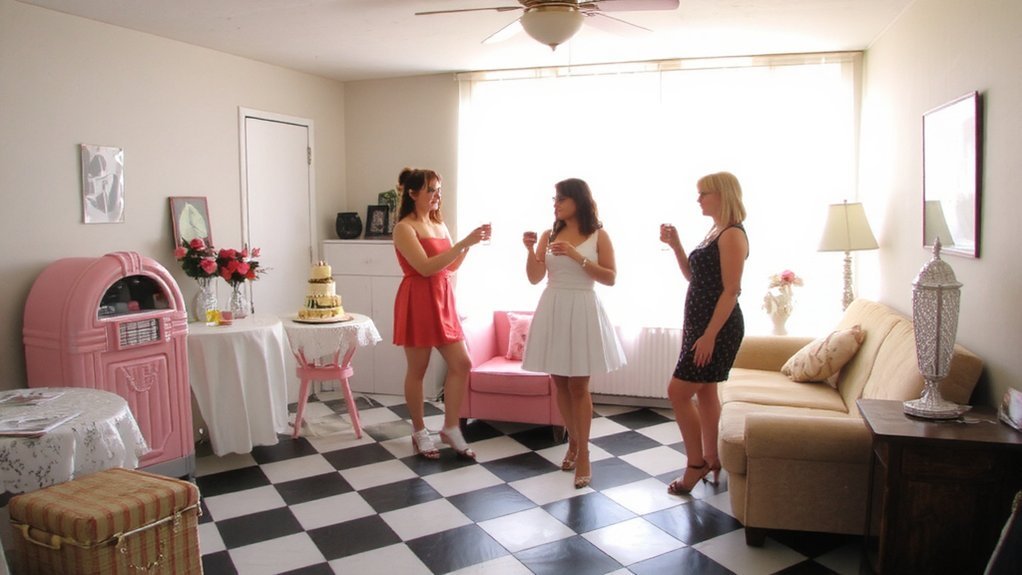
Think of your party as a neon pinwheel waiting to spin you straight into the 50s. You’ll want a poodle-skirt mini shoot, a diner-style feast with gluten-free options, and a bold milkshake bar to match the mood. Curate a jukebox-inspired playlist, set up a drive-in or car-hop vibe, and assign roles like toast master and photo captain to keep energy tight. Want more ideas that actually land with guests who crave vintage glam without the fuss? Keep going.
Retro Diner Dinner Party
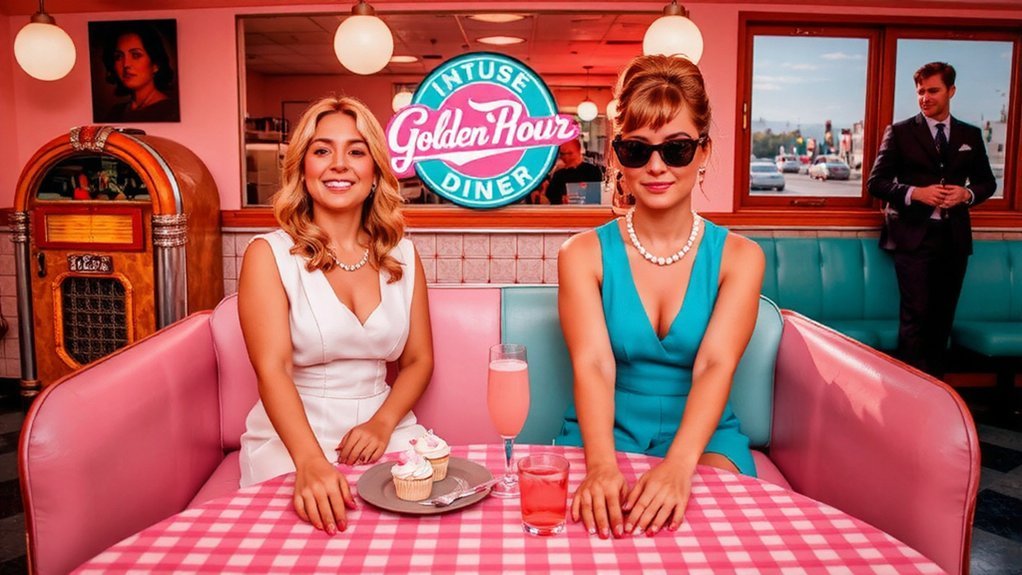
If you want a vibe that’s equal parts fun and nostalgia, start with a retro diner turnout that screams 50s charm but runs on modern comfort. You’ll book a booth, set chrome accents, and let jukebox vibes guide the night. Decide on a simple menu: burgers, fries, shakes, salad, and a few gluten-free options. Clear menu pricing helps guests budget upfront and keeps the vibe relaxed. Nail diner etiquette: mingle at the counter, tip promptly, and avoid loud phones near the mic. Use color blocks and neon to cue activities, not chaos. Assign roles—toast master, photo captain, and dessert organizer. Keep timing tight, portions shareable, and captions witty. Your crew leaves smiling, caffeinated, and ready for the next toast. The night ends with applause.
Milkshake Bar Masterclass
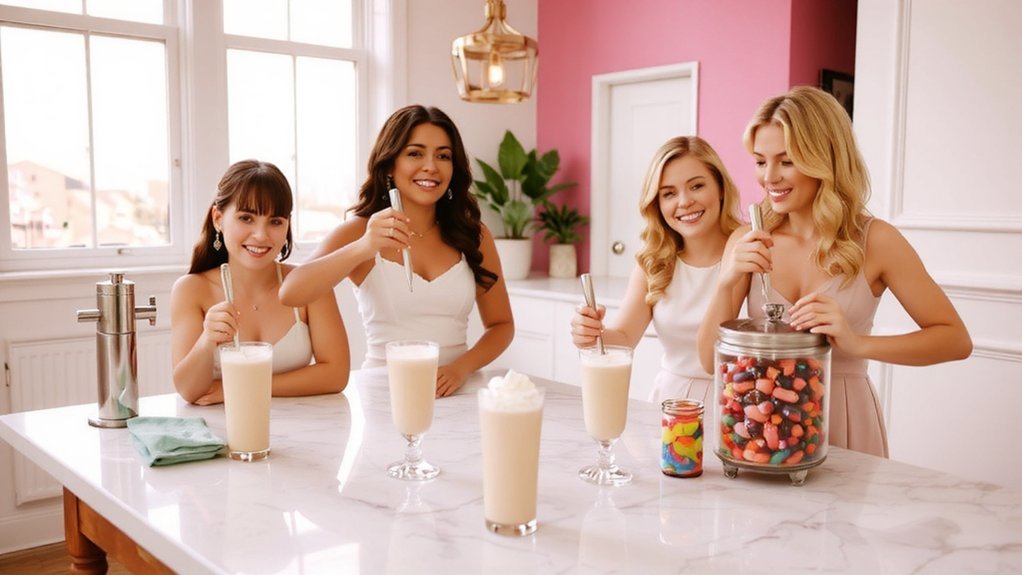
Ever wondered if a milkshake bar can steal the show without turning into chaos? You’re about to prove it. Set up a station with three base flavors, two dairy-free options, and a fearless toppings rack. You guide guests through flavor pairing like a friendly mixologist, not a museum curator. Keep blending techniques simple: pulse for texture, blend for creaminess, scrape between runs. Label your syrups, chillers, and jars so everyone knows what’s in play. Offer quick demos: one-minute shakes, then let them riff. Use color, aroma, and bite—salted caramel and a chili chocolate, mango-lassi, or vanilla with espresso drizzle. End with a tasting tally so you capture favorites and feedback, fast, clean, and fun. Keep it tight, keep it stylish, and everyone feels included.
Jukebox Playlist Boost

Ask guests to submit Customizable Jukebox Requests ahead of time so you’re not scrambling during the party. Mix in Nostalgic Theme Hits to set the vibe, then sprinkle in a few modern cuts so the playlist stays fresh. Tell the DJ or your app to prioritize crowd favorites and keep a quick veto list handy so you control the flow.
Customizable Jukebox Requests
Honestly, why settle for a static playlist when you can customize it on the fly with a jukebox boost? You’re guiding the night, not praying for luck. Set up a live request pane, show the guests how to drop a quick song selection, and let the vibe shift as you move from chill to hype. Custom playlist control means fewer dead moments and more bold choices—perfect for the moment you want to seal the memory. Offer a few guardrails: favorite genres, must-play songs, and a cap on repeats. You’ll keep momentum, avoid chaos, and everyone feels heard. It’s practical, fast, and surprisingly fun—no drama, just clear, cool beats. You’ll see smiles when the room nods, phones tap, and the couple’s playlist becomes a memory.
Nostalgic Theme Hits
Channeling a nostalgia wave with Nostalgic Theme Hits is easy when you lay out a few guardrails and let the jukebox do the rest.
Set the vibe with a limited, on-theme picks list. Tap retro playlists that span the late 90s to early 2000s, then mix in a few cheeky throwbacks. You want energy, not homework—keep shifts quick and let each track cue the next scene. Invite the bride squad to request a few favorites, but curate the rest so the flow stays crisp. Label stations by mood—dance floor bangers, chill sing-alongs, guilty pleasures—and keep the volume friendly. A simple cover art motif, like neon, glitter, or polaroids, ties the night together and reads as intentional. Vintage vibes meet modern playability with a quick tap, and your playlist shines.
Poodle Skirt Photo Shoot Ideas
A poodle skirt photo shoot is your fast track to retro fun. You set the scene with a bright toppled jukebox and mid-century props, then guide your crew toward bold, playful poses. Choose a high-waist poodle skirt in cherry red, pair it with a cropped cardigan, and let the camera love the contrast. Try poodle posing for variety: dip, twirl, lean, and wink at the lens. Mind hemline angles so the silhouettes read clean on every shot—test three heights and shoot from knee to hip. Use sticky notes on the frame to cue poses, then recycle takes to keep energy high. Keep captions cheeky but tasteful, and stitch the set with quick, confident direction. Your friends laugh, you nail the vibe, the album shines.
Leather Jacket Chic Outfits

That retro gloss you teased with the poodle skirt can ride shotgun with a leather jacket and still feel fresh. You want outfits that snap from day to night, not a costume. Start with leather layering that hugs your curves or skims the frame, depending on your mood. Pair a cropped biker or moto with a sequin mini for edgy silhouettes that shout party without shouting. Throw on opaque tights, ankle boots, and a bold lip, and you’re ready for candid photos and non-stop toasts. If you want contrast, swap the boots for kitten heels and keep the jacket intact. If you want drama, add a chain belt. Keep the jacket’s hardware visible for focal points. Go with a monochrome palette to keep cohesion.
DIY Photo Booth With Neon Props
Want a picture-perfect party moment without chasing it all night? Set up a DIY photo booth with a bold neon twist: a simple backdrop, battery-powered lights, and props that glow when flashed. Use neon props like oversized sunglasses, speech bubbles, and a laser-cut frame to pop on every shot. For lighting ideas, mount LED strip lights along the edges, aim a soft box at waist height, and keep the rest dim so glow stands out. Tape a small tripod or stand and couple a phone or camera with a remote. Keep captions ready and swap props every hour to keep pics fresh. It’s fast, cheap, and totally millennial chic. Shareable moments flood your feed, and guests leave bragging rights, not excuses for your crew.
Classic Car Cruise
Grab the keys, pick a lineup of vintage rides, and plan a short, scenic cruise that stays smoother than the drama of the night before. You’ll map a simple route, hit coastal streets or a quiet river road, and let the engines hum while you chat. Choose cars with character—two-doors, a real dashboard, and those chrome touches that catch eye-rolls and smiles alike. Pack snacks, playlists, and a small camera to capture goofy portraits beside your favorites. Gasoline nostalgia fuels the vibe, but keep it modern with toll-free GPS cues and a check-in plan. Vintage cruising becomes a shared story, not a throwaway moment, so keep pace steady, keep hands relaxed, and let laughter steer the way. Your crew will thank you, finally today.
Pin-Up Style Makeup Tutorial
If you want true pin-up vibes, start with Classic Pin-Up Essentials—defined brows, a crisp winged liner, and a bold red lip. Use liner to shape a sharp cat-eye, then dab on a red lipstick with a matte finish so it lasts. Keep skin simple, smooth, and shine-free, and practice with clean swipes so your look reads retro even in low light.
Classic Pin-Up Essentials
Classic pin-up makeup isn’t about complexity; it’s about clean lines and a bold finish you can duplicate. You’ll want a flawless base, matte skin, and brows that say, I mean business. Start with a light foundation or BB cream, blend, then set with powder so nothing slides. For the eyes, focus on a crisp cat eyes look—winged liner that ends at the outer corner, not a messy experiment. Dust a neutral lid, add mascara that thickens without clumps. On cheeks, dab a peach or pink, sweep a hint of highlighter on the cheekbone for glow. Finish with a bold lip; red or berry works, but in true pin-up fashion, pair with polka dots on nails or accessories. Practice first; you’ll nail it at dawn.
Liner, Red Lip Look
Start with a clean, primed base so your liner and red lip don’t budge. Now you lock in shape with a precise liner technique, not a shaky scribble. Choose a rich, true red, matte if you want maximum staying power. Steady your hand on a flat surface, and draw a clean Cupid’s bow, then thicken the outer edge for that vintage punch. Fill in with lipstick to seal the line. For smudge prevention, blot lightly, re-apply, then dust a translucent setting powder along the lip line. Keep the rest clean—eyeliner minimal, lashes bold. Quick fix: carry a mini lip brush and reseal the cap with a dab of balm for touch-ups. You’ve got a glam, no-fuss pin-up lip. Own the look, own the moment.
Swing Dance Night
Want to shake off the wedding planning chaos? Grab your crew and roll into a Swing Dance Night that’s all swagger and rhythm. You’ll set a playful tempo, clear space, and push aside confetti for a beat. Learn Lindy hops in quick, goofy bursts; this isn’t rehearsal dinner class stuff, it’s instant energy. Practice Partner timing with a brave spin, a wink, and a countdown you control. Hire a compact instructor or grab a savvy friend who knows the floor. Create a mini-competition: who nails the hop, step, dip, and smile fastest? Keep playlists punchy—swing classics, brass, clap-along breaks—to keep hips moving between lessons. End with photos mid-swing, proving you can host bold, joyful nights, not polished anxiety. Your crew will thank you later.
Soda Fountain Mocktails
Soda fountain mocktails bring bright, bubbly vibes you can actually pull off. You’ll skip fuss and still serve wow. Start with a base of club soda or seltzer, then add a bright syrup and a tart twist. Flavor pairings matter: strawberry with basil, lemon with ginger, blueberry with lavender. Don’t overcomplicate; keep it balanced so the fizz stays vivid. Syrup sourcing matters too—look for simple ingredients, clear labels, and local flavors you can brag about. Make a quick bar station: chilled bottles, small jiggers, and mason jars. Garnish boldly—mint, citrus peels, edible flowers. Pro tip: offer a couple of “mocktail flights” so guests compare options. You’ll spark conversation, capture photos, and keep the vibe playful but chic. Each sip should feel easy, approachable, unforgettable.
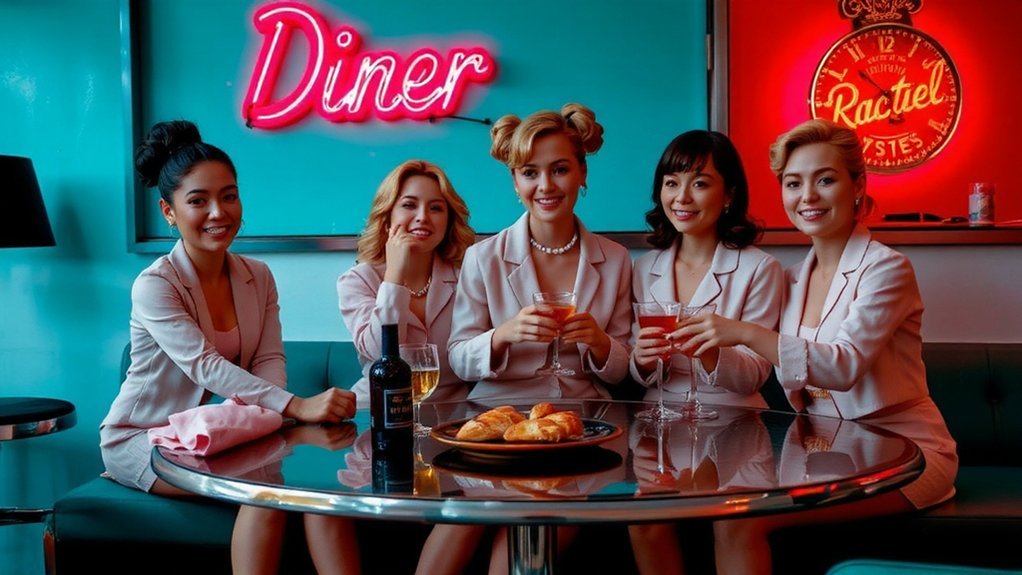
Vintage Cocktail Night
From the fizz of the mocktails, you’ll pivot to timeless sips that feel like a wink from the past. Vintage cocktails aren’t dusty antiques; they’re clever twists you can claim as your own. Pick classics, but retool them with modern ice technique and bright, unexpected garnishes. Serve a gin fizz with crystal-clear ice that melts slowly, then top it with a citrus twist and a sprig of rosemary for perfume, not a punchline. Pair each drink with a simple bite and a smart Garnish pairing guide: protocol, not pomp. Keep the night brisk: pour, sip, swap. Invite guests to remix a recipe, then snap photos for a retro-feeling feed. Your party, sharpened, curated, and delicious. Bold ideas, clean lines, and crystal-clear flavors ahead tonight.
DIY Flower Crown Workshop
Let’s cover the DIY Flower Crown Basics you actually need—how to pick blooms, prep stems, and choose a sturdy base. Then we walk through a Step-by-Step Crown Workshop: prep station, wire and tape, add blooms, and test fit until it stays on. You’ll leave with a clear checklist, a visually tight crown, and a simple cadence you can repeat for future parties.
DIY Flower Crown Basics
Grab a handful of fresh blooms, a spool of floral wire, floral tape, and a sharp pair of scissors, because we’re making a flower crown together. You’ll learn the basics fast, then tailor the crown to your vibe. Start with floral wiring basics: twist a small base frame, then weave in greens for strength. For petals, keep to medium-size blooms and balance color through petal selection. Don’t overthink symmetry; aim for a natural, garden-touched look. Secure each segment with a touch of tape, trim clean edges, and test the fit on your head. Wear it with confidence, not chaos—your crown should feel light, flexible, and ready for photos. Keep extra flowers on hand for quick tweaks and remember: patience makes petals pop in frames.
Step-by-Step Crown Workshop
You’ve got the basics down, so it’s time to run a hands-on crown workshop. First, lay out a simple frame kit and pick stems that stay sturdy. You’ll pair sturdy greens with bright florals, then test fit on a guest’s head as you go. Keep tools handy: floral shears, pliers, and spare wire. Material sourcing matters—choose local, seasonal blooms for color punch and freshness, and have backups in case a stem wilts. Now, ribbon weaving comes next: loop, twist, and secure the ribbons into a neat, adjustable tie. Teach two quick passes, then let everyone sculpt their own style, from wild garden to sleek crown. Finish with a quick spray of sealant and a brag-worthy photo. Share tips, approve color schemes, and snap shots.
Rockabilly Hair Styling Session
A rockabilly hair styling session is all about big waves, glossy pin curls, and a little swagger. You bring a visor, a spray bottle, and a plan. We map out pompadour techniques that hold all day and night without feeling stiff. You’ll learn bangs styling that blends retro edge with modern softness, so your brows stay framed and expressive. I’ll coach you on sectioning, blow-drying, and flicking ends with a tiny brush, then sealing with a light finish spray. Expect quick checks in the mirror, a few jokes, and real-time tweaks to fit your hair texture. Leave with a ready-for-Instagram look, plus DIY tips to recreate the vibe at home. If a strand misbehaves, you own it with calm moves, not moody drama. This session trains you to switch up styling on the fly, anytime. Practice notes and touch-up kit included.
Glamour Glam Photo Shoot
Even if you hate posing, the Glamour Glam Photo Shoot will make you look like you actually enjoy it. You walk into a bright, chic setup, and the camera seems to wink back. Here, lighting setup matters as much as wardrobe, so we test a few angles until every glow hits just right. You’ll get clear pose concepts that feel relaxed, not rigid, with prompts that keep you moving and smiling without forcing it. Our approach is playful and precise: quick direction, steady rhythm, and one or two daring frames you can brag about. Bring confidence, a stylish bod, and a friend who won’t hype you up beyond truth. Snap, share, celebrate—with no awkward echoes of the past. Keep it bold, keep it fun.
Midnight Drive-In Movie
Set up a Screen Under Stars with a smooth white sheet or a portable projector screen, pick a clear spot away from glare, and test the view before guests arrive.
Line up Retro Drive-In Classics on a chill queue, stash popcorn, candy, and cool drinks, and let the audio ride through the car speakers or a borrowed Bluetooth speaker.
Create a Cozy Car-Side Setup with blankets, cushions, a thermos of cider, and a little lantern, so everyone can lean back and still chat without shouting.
Screen Under Stars
If you want something low-key but wildly memorable, a Screen Under Stars, a midnight drive-in movie, fits the bill. You’ll set up a small, portable projector or a rented screen, but keep the vibe intimate: comfy blankets, low speakers, and a clear view from the car or lawn. Think outdoor cinema with a twist—twinkle lights, starry seating, and snacks that soundtrack the night. Pick a cult favorite or rom-com, print a tiny program, and let guests vote on the finale. Skip heavy tech: keep sound balanced, neighbors happy, and parking simple. Pack warm layers, bug spray, and a few beverages. End with a toast, a memory reel, and a wheel’s worth of photos. This setup fuels chit-chat, laughter, and better, bolder ideas for tomorrow.
Retro Drive-In Classics
Grab a lineup of retro drive-in staples that scream late-night nostalgia and cheap popcorn. You grab the wheel, roll into the lot, and pick a screen that looks like a treasure map. Midnight energy, neon glow, and film reels crackling in your speakers—this is theater camping with swagger. Choose a double feature that scratches your itch for fearless, throwback charm. Think zany comedies or moody romances that age well, served with hot dogs and a mocktail shake. Carhop nostalgia vibes boost the vibe; you’re not just watching, you’re curating an atmosphere. Prep a playlist of voiceovers, bumper stickers, and trivia prompts to spark chatter between scenes while you dodge the bleacher chatter. Keep it intimate with a small snack station, a fog of mock fog, and a quick cleanup plan so the party stays fresh for sunrise photos.
Cozy Car-Side Setup
You roll up, back your SUV, and turn the hatch into a portable living room, blankets and pillows already plotting a comfy siege. You scout a driveway setup with string lights, battery-powered lanterns, and a tiny projector propped on the bumper. You pull the seats to create a low, couch-like row, then lay down a plush mat for a soft heel-toe zone. Curbside seating becomes a throne for the night, with cooler snacks within reach and a DIY snack bar you can rework in minutes. Keep it simple: a portable speaker, warm throws, and a clear screen. The goal is cozy, chic, and wildly practical—no fuss, just a perfect midnight drive-in upgrade. You’ll love the control, the closeness, and the easy cleanup afterward tonight.
Record Store Scavenger Hunt
Ready to turn a boring afternoon into a mini adventure? You’ll map a route through a beloved record shop, racing time and taste. You’ll hunt for vinyl clues tucked between sleeves and posters, jotting notes like a savvy detective. The goal isn’t perfection; it’s momentum, a crate challenge that keeps the buzz high without dragging you down. Split into teams, set a quirky timer, and let each clue lead to the next rack, where a song snippet or color tag hints at the prize. Snap photos, trade guesses, and claim a mini prize at checkout. Keep rules simple: stay kind, stay curious, and celebrate the find with a toast back at home base. Your crew leaves louder, braver, and somehow cooler than before tonight.
Tailored Fifties Invitations
Why settle for boring invites when you can swing into the fifties with tailored invitations that shout pinup and poodle skirts? You want options that feel authentic, not an afterthought. Pick sturdy paper stock that handles bold inks without flaking. Go for a retro vibe with clever font pairing—combine a bold display font with a clean sans for readability. Keep lines tight and copy punchy: RSVP, date, and venue pop on a single, glossy card. Add a sassy tagline and a doodle border that nods to diner menus. Avoid clutter; let white space breathe. Send them in mint-green or cream envelopes that echo classic diners. Your guests will open, smile, and spill the party plans. You’ll get compliments, RSVP quickly, and start the party.
Rosy Pink and Black Decor
A rosy pink and black setup keeps the pinup vibe bold without turning cheesy, so you’ll want contrast that pops and a few clean anchors to keep it chic. Start with a black backdrop and dusty rose balloons, then layer velvet textures in throw pillows and table runners. You’ll notice rose motifs stitched into napkins, centerpieces, and sign banners, tying the theme without shouting. Keep surfaces glossy and mirrors clear to amplify light, not clutter. For lighting, string bulbs and pink-tinted bulbs in clusters; avoid anything too frosty. Add metallic accents—silver or antique gold—to sharpen the contrast. Think decor: cake stand, favor boxes, and a photo wall with typography. This look stays fresh by mixing matte with shine, and by letting negative space breathe.
Milkshake Bar Vibes Lighting
How do you light a milkshake bar so it looks picture-perfect without frying everyone’s eyeballs? You want soft glow that still pops, not a flashbang. Use warm LEDs, not cold fluorescents, to keep skin tones friendly. Aim for 3000K–3500K glow accents, like tiny suns tucked behind cups, napkins, and straw holders. Add a dimmable strip under the counter, then layer neon warmth with a couple of strategically placed backlit signs. Keep shadows soft; avoid harsh spillover. Use matte finishes and glassware to diffuse light. Position a couple of compact spotlights angled toward the milkshakes, not at the patrons. Balance glow accents with the bar’s color palette for cohesive vibes that feel fresh, not retro-rattling. You’ll nail a cinematic, selfie-ready setup. Dramatic yet friendly, always.
Classic Diner Tableware Rentals
You’ve set the glow; now dial in the plates and cups so the vibe reads as intentional, not accidental. Classic diner tableware rentals let you keep the charm without the clutter. Choose solid color plates with a subtle gloss and mix in chrome utensils for a wink to retro. For glassware, lean into sturdy highballs and milkshake cups that survive shindigs and spills. Ask your supplier about china sourcing and glassware pricing upfront, so you’re not chasing surprises later. Bundle a small lot of matching saucers to hit the table with consistency, then swap in a few mismatched pieces for character. Book early, confirm numbers weekly, and request clear condition notes. Your guests will notice the crisp, deliberate setup. Make it unforgettable, minus fuss.
Cropped Cardigans and Capes
Cropped cardigans and capes are your quick punch of polish for a night out. Choose a cropped cardigan in a stretchy knit or a lightweight satin cape, then layer jewelry and a bold lip. The trick is fabric compatibility—pair breathable knits with fitted silhouettes so you don’t look overdressed. For evening photos, a cropped piece keeps your waist defined while the cape adds drama without bulk. Follow styling trends by contrasting textures—think ribbed knit with satin lining, or velvet over denim. Keep it practical: a magnetic clasp or a simple hook helps you switch looks fast. You’ll feel chic, not fussy, and the outfit reads confident in candid shots. That’s the point—clothes that move with you, never against you. You’ve got this, stylish friend.
Betty Vs Veronica Costume Contest
Ever wonder which Riverdale icon still rules a party: Betty or Veronica? You’ll settle it with a costume showdown that’s as witty as it is stylish. Pick one vibe, then push it hard: Betty for brave, Veronica for bold. Set a simple rule: two minutes to pitch your look and why it matters. Have guests vote, but also film quick montage clips for social proof. Do a rivalry analysis after, noting how colors, hair, and attitude flip the room. Keep accessories minimal but noticeable—green apple pins, red lip gloss, chunky bracelets. Dress rehearsal helps, so practice your walk and quips. The winner gets a cheeky trophy; the rest get bragging rights. Say it loud, stay playful, and own the moment without apology, for sure.
Vintage Jewelry Making
Sourcing old brooches and beads is your first move, turning junk into jewelry with a little imagination. You’ll pick clean, sturdy pieces, not fragile tat. Then you map beadwork techniques you actually can pull off today. Skip fluff, go for bold bracelets, chokers, and earrings you can wear. Use simple knots, crimps, and wire bends to secure drama-free pieces. Practice earring making with matching sets, then mix textures for edge. Label your jars, photograph a quick tutorial, and share the win. Your guests will remix old pieces into fresh, Instagram-ready stories. When a piece feels too fussy, strip it back and rebuild. That pragmatic sparkle sells the vibe without losing your bite. Keep it tight, fun, affordable, and proudly handmade. Let creativity spark loudly.
Diner-Themed Cake and Treats
From vintage jewelry is a short hop to a brighter table, because your party’s about edible sparkle now. You want diner nostalgia without the sugar coma, so start with mini diner cakes in pastel chrome wrappers. Pick a core flavor lineup, then pair icing flavors that punch—vanilla custard, peanut butter velvet, lemon meringue—and label them clearly. For cake textures, contrast soft sponge with a glossy ganache or a crisp cookie crust. Create cookie oreos as “soda shop” stands and offer chocolate-dipped tacos for bite-sized fun. Keep colors bold but cohesive, and roll in retro fonts on toppers. Serve milkshakes in glass mason jars and drizzle caramel on everything, because bold, simple choices win. Your guests will snap pics and beg for seconds right away.
Vinyl Record Guestbook
Turn your guestbook into a vibe with a Vinyl Record Guestbook that’s as fun to sign as it is to look at. You pick a real record, maybe a classic from the bride’s era, and lay it flat on a signable sleeve. Guests write on the jacket and spin the story when they sign, like a tiny performance. This is about Record preservation with style, not just signatures. Give a few prompts: best memory, future vows, or a quirky wish. You’ll photograph each guest signature, then mount the records in a gallery-style display. It’s personal, interactive, and surprisingly easy to DIY. A stylish keepsake your future self will actually show off. Keep markers handy, and rotate the display for ongoing party energy all night.
Rubber Duck Photo Props
If you liked turning the guestbook into a vibe, these Rubber Duck Photo Props keep that playful energy alive in pictures. Think bold, not goofy. Pick three to five ducks that match your color scheme and vibe. You place them where guests will actually look: near the cake, beside drink stations, and in closeups with the bride. Duck aesthetics matter, so choose glossy finishes for glam shots and matte for quirky candids. Pro tip: swag the ducks with tiny accessories—mini sunglasses, lace scarves, or metallic hats—to echo the ceremony mood. Keep props placement intentional: keep a dedicated tray or mini float dock so guests don’t hunt through purses for props. Snap in natural light, crouch for fun angles, and tell guests to corral everyone into one shot. Simple, sharp, memorable. Skip clutter, aim for smiles, and let the duck chorus steal your feed for good.
Letterboard Signage With Quotes
When you pick a letterboard, start with quotable ideas that fit your vibe—funny, cheeky, or heartfelt. Think typography and color: bold sans for punch, chalky script for charm, white on black or warm tones that pop in photos. And keep it DIY doable: space lines evenly, tape guides, and swap in new quotes for different party moments.
Quotable Letterboard Ideas
You want quotable letterboard ideas that pop, not mushy mush. Skip generic prints. You crave sharp lines, bold tips, and wit that lands. Think punchy lines, not poems. Use inspirational quotes, witty sayings that spark conversation at the party. You’ll mix humor with heart, balancing bold sizes and brief lines for impact. Your goal is shareable moments, not fluff.
Try a layout: line short and loud, bottom line longer. Use parallel phrasing for speed-read impact. Pair a witty saying with a sincere line for balance. Collect a handful of options, rotate them so guests see fresh. Write the choice in uppercase for drama, others in lowercase for contrast. Have a snappy shot list: mirror, drinks, cake, couch. A board becomes a keynote, not clutter.
Typography & Color Choices
Typography sets the vibe before a word lands, so pick fonts that shout clarity first and personality second. You want letterboard quotes that read quickly, feel modern, and avoid chaos. Start with two fonts max: one bold for emphasis, one simple for the body. That’s where font psychology comes in—shape, spacing, and contrast steer emotion in a glance. Pair colors with intention, not trendiness, aiming for color harmony that stays legible in photos and on screens. Keep phrases short, punchy, and actionable; you’ll memorize them faster and friends will read them aloud without squinting. Test on real light—gold, blush, slate—and adjust kerning until every word sits cleanly. Clarity wins, style follows, and the moment lands. Trust the visuals to do the talking, effortlessly today.
DIY Signage Tips
How do you make quotes pop on a letterboard without chaos? You pick a clean baseline, then layer contrast. Use chalkboard signs for a moody, retro vibe, but keep the rest simple so the quote isn’t shouting. Opt for bold vinyl lettering on the top line and smaller words beneath to build rhythm. Trim spacing so each word breathes, not leaks into the next line. Plan short, punchy lines you can read at a toast. Keep color intentional: white on black, or gold on navy. Prep a dry-run boards first, then snap photos to check legibility. Store extra signs flat, label packs, and swap quotes fast at the party. Simple, direct, memorable. No fluff, just results you can brag about later to your guests.
Pin-On Badges and Flair
Ever wonder why pin-on badges instantly level up a party vibe? You grab a bag of badges, and you’re on a mission to set the tone. This is where badge etiquette matters: a few well-placed pins say more than loud confetti. You steer the crowd with flair styling—mix metallics, pastel enamel, and a bold nickname for each guest. Keep it simple: one signature badge for the bride, a few playful ones for crew, and some crowd pleasers for the rest. Swap designs mid-arc to keep energy high, and snap photos before the glow fades. Provide a quick card with care tips, pin removal notes, and storage hacks. When in doubt, choose clarity, not chaos. Your guests will thank you with smiles, selfies, and compliments.
Charleston Dance Workshop
You’ll pick up Charleston steps fast, nail the kicks and quick spins before the song ends.
We’ll lock in rhythm groove with simple counts and a steady bounce so you actually move to the music.
Dress for Charleston with comfy heels, clothes that move with you, and a little fringe or shine so you look the part without fighting your outfit.
Learn Charleston Steps
Grab your dance shoes and arrive ready to move. In this Charleston steps session, you’ll learn to spark a room with quick feet and bold timing. You’ll break down basic footwork first, then layer in the hip swing and shoulder bounce that makes the shuffle feel effortless. We’ll practice in small bursts, so you actually feel progress, not paralysis. Expect short drills, clear cues, and feedback that cuts to the chase. Mastering timing counts means you stop guessing and start syncing with the beat, even when the music throws a curveball. No fluff, just practical moves you can perform tonight. You’ll leave with a notebook of steps, a confident grin, and a plan to keep the energy high for more dazzling throwbacks ideas.
Rhythm Groove Focus
This Rhythm Groove Focus locks you into the heartbeat of Charleston, teaching you to ride the groove instead of chasing the clock. You’ll learn to listen to the bass, count by feel, not by a timer, and you’ll enjoy the moment, not punish it. We split the session into tempo analysis drills, then lock in a swing with microadjustments.
Groove psychology sits at the center: how your body feels the beat, where you drop weight, when you push off. This isn’t about perfect steps; it’s about confident flow. Apply what you learn to corners and poses without losing focus. Do a tempo check, then ride it. You’ll leave with vibe you can repeat. I’ll stay crisp, actionable, funny, delivering a skill you can use.
Dress for Charleston
Speaking of groove, let’s talk about what you wear to actually move in Charleston, not just look the part. You’re dancing, not modeling, so pick fabrics that breathe and stay slippery-free. Think a tea length dress or a Charleston-friendly jumpsuit—something that twirls, not teases the floor. Keep accessories minimal but smart: lace gloves can add polish without stealing grip on your partner. Heels? optional. Opt for low, sturdy heels or stylish flats with ankle support. Choose a waistband that won’t ride up during spins, and seams that won’t snag. Colors: bold but not loud. Moveable, breathable, and easy to wash after the workshop. Ready? Practice steps before you go, so your outfit supports every kick, clap, and cool syncopation. Keep it practical, chic, fearless.
Rock ‘n’ Roll Lip Sync Battle
Choreographing your performance, you’ll turn a simple karaoke bit into a mini-rock show that everyone remembers. You pick a killer song selection that suits your vibe and the crowd’s energy, not just what you personally love. Learn a few bold moves, a quick shimmy, a drop into a lean, a dramatic pose between lines. Practice quick changes so you’re smooth, not stuck. Your goal is crowd interaction that feels playful, not like a performance review. Cue lighting cues on the beat, nail the mic drop, and toss in a wink to the bride. Keep the tempo, tease the chorus, and invite selfies after. It’s bold, it’s fun, and it ages well with champagne. Stay sharp, own the night, and let the memories sparkle tonight.
Soda Fountain Photo Backdrop
Set up a retro soda fountain backdrop with a glossy, pastel base and a slim chrome frame to sell the vibe. Think colorful props you can actually pose with—oversized straws, sugar-cube garlands, chalkboard menus, and fake ice cream scoops that invite snaps. Keep the lighting simple and side-lit so the colors pop, and add a small prop rack so guests grab a moment and move on.
Backdrop Setup Tips
Start with a clear plan: a soda fountain backdrop should feel retro, not chaotic. You want a clean scene you can actually photograph without chaos in the frame. Build layers with fabric textures that read old-school but stay tidy—think velvet rope red, burlap for a wink, and satin that catches light. Set lighting ambiance to mimic a diner’s glow: warm, soft, and directional on the backdrop so faces pop. Use a simple chalkboard sign for authenticity, and keep props minimal but meaningful—minty glass bottles, striped napkins, a chrome edge somewhere. Tape everything down, measure height, and test shots at the same time of day as your party. Quick dry, quick reset, big impact. Your photos will look crisp, cohesive, and instantly Instagrammable for guests.
Colorful Prop Ideas
Brighten the frame with bold, pocket‑friendly props that scream retro without stealing the show. You want color that pops on camera, not chaos in the background. Start with prism balloons layered at varying heights for depth, not a balloon avalanche. Tie in glitter props—like confetti forks, sparkly napkin rings, and tiny chrome signs—that catch the light without stealing the scene. Create a candy‑shop vibe by using striped backplates, neon swizzle sticks, and translucent soda cups you can actually drink from after the shoot. Keep everything scalable: a few big elements plus handfuls of small accents. Rotate props between poses, so every shot looks fresh. End with a simple layout card to guide guests and keep the setup speedy. They’ll thank you with effortless smiles.
50s Style Nail Art Session
Here’s the plan for a style nail art session you can actually pull off. You’ll start with a clean slate and pick a bold palette. Go gel nails or press-ons if you’re short on time. For drama, try glitter tips on one accent nail. Use a striping brush, not a fireworks display, and ditch bulky topcoats. Dry under a fan, then seal with a quick matte layer. Snap pics in natural light, clean edges, and move on. You’ll mix textures, but keep the vibe cohesive and easy. Invite a friend to judge, but commit to bold choices. Finish with a wink and a gloss that lasts. Ready, set, swipe, and show off the scene online for brag-worthy vibes. Keep it simple, sharp, and stylish.
Leather Glove Etiquette Class
In this Leather Glove Etiquette Class, you’ll start by getting the size right—no loose cuffs, no pinched fingers. Practice proper donning etiquette: slide your fingers in, pull to the wrist, and keep jewelry out while you’re at it. You’ll hear concrete tips on Glove Sizing Etiquette and Proper Glove Donning Etiquette so you can look sharp in photos without fumbling.
Glove Sizing Etiquette Tips
How do you size gloves without looking ridiculous at a party? You start with fit guidelines, not guesses. Measure your hand width and length, then pick a size that feels snug but not tight. If you’re between sizes, choose the smaller for dexterity or the larger for comfort, depending on fabric. Leather gloves mold to your hand, so a barely tight pair loosens, a loose pair never tightens. Check the glove length—should end at your wrist bone, not ride up your forearm. Try them on with the outfit you’ll wear; sleeves can push or bunch fabric oddly. Avoid extra bulk like heavy liners, which ruin dexterity. Break them in with gentle flexing, not by pulling them on like a vise. Keep it smooth, stylish.
Proper Glove Donning Etiquette
When you don leather gloves, you do it with intention, not a monkey grip. First, pick the right pair based on glove sizing. If they’re tight, you’ll feel it in minutes; if they’re loose, they slip and look sloppy. Slide your hands in smooth, one hand at a time, fingertips first, then the palms. No bunching, no tugging at seams. Wiggle fingers, test grip, then adjust at the wrist with a clean, confident pull. Remember the donning technique: cuff up or down to suit the moment, adjust the fit, then button or snap as needed. Keep nails short, skin dry, and gloves clean for a crisp, polished line. This isn’t theater; it’s presence you wear. Practice in front of a mirror until effortless daily.
Teen Angel Themed Dessert Table
A Teen Angel-themed dessert table blasts a playful, not-too-sweet vibe that fits a fun, late-night vibe without feeling childish. Your spread should feel light but clever, like you discovered candy in the clouds. Start with angel cupcakes on a white tier, each topped with halo sprinkles and a tiny edible halo. Add a comet-chocolate sign that reads ‘Swoon-Worthy,’ and lace the table with pearl runners. For drinks, serve vanilla-mint mocktails in frosted glass jars, labeled cheekily. Keep dessert stations reachable at eye level, so pics and plates happen in a shot. Think mini bites: lemon meringue, coconut snowballs, sugared almonds. You control mood, and guests will thank you with grins.
Pompadour Barbie Photo Station
Let’s set up a Pompadour Barbie photo station that screams retro glam without shouting. Your guests will strike poses beside a velvet backdrop and a chrome tripod. Pin a few quick cues on a clipboard: Pompadour techniques, keep volume up but smiles natural, tilt the head, and snap before they blink. Use Barbie aesthetics as your north star: pink accents, bold lashes, and clean lines. Provide props like feather fans, oversized sunglasses, and a faux milkshake in a retro glass. Keep the setup modular so you can move pieces between tables. Instruct your photographer to shoot in bursts, not poetry, so you capture the real moment. Short captions make the album pop, and a simple gallery wall seals the vibe. Keep it fun, seamless.
Drive-In Snack Kits for Guests
Let’s talk Drive-In Snack Kits for guests, because you’re not just handing out chips at a party you pretend is retro; you’re delivering a mini-movie snack experience. Start with core drive-in staples—popcorn, candy, a soda or mocktail, and a small themed treat—then add fun extras to match your vibe. Put together themed snack kits guests can grab from a car window or table, with simple labels and quick setup so you actually spend time partying instead of fussing.
Drive-In Snack Staples
Snack kits for your drive-in party should be ready to roll the moment guests arrive. Think practicality with swagger: single-serve bags, napkins, and a tiny cooler for sauce dips. Build staples you can assemble in minutes: corn dogs and french fries pair well with quick dips, plus a veggie option for balance. Preportion toppings into squeeze bottles, label clearly, and keep them chilled. Use sturdy, spill-proof containers so mess stays at bay in the car. Set out a simple card with hot-or-cold notes and a suggested eating order. You want efficiency, not chaos: one station, one line, zero drama. Deliver comfort snacks that feel premium, not DIY chaos. Include clear pricing, available substitutions, and a quick refill plan for late arrivals. Keep it calm.
Themed Snack Kits
Ever plan a drive-in party and realize your guests are hungry and picky at the same time? You don’t want chaos, you want control. Themed snack kits lock in variety without chaos: fast assembly, clear labeling, on-theme flavors. Pack savory bites that travel well—corny popcorn mix, spicy pretzels, mini sliders in stackable cups. Add dessert jars for a sweet finale—layered yogurt, berry compote, chocolate crumble, all in portable jars. Build kits in three sizes: standard for crew, deluxe for VIPs, and a kid-friendly option. Include a quick note card with pairing ideas and a napkin dispenser. Quick, tidy, Instagrammable. Your guests grab, share, snap, and go, leaving you with glow and zero leftovers. Simplicity wins, and you look fearless doing it. Every detail matters.
Dignified Tea Party With Scones
If you want a classy vibe, a dignified tea party with scones delivers that quiet, grown-up charm. You host with intention: delicate china, linen napkins, a modest playlist. You set the scene, then let small rituals do the talking. Focus on Tea etiquette, not hype: clinking cups, proper pinky, and soft invites. Offer two tea options, one caffeinated, one herbal, served in warm pots. Scone varieties bring texture—bright zest, plain butter, or clotted-cream twists. Keep portions neat, three bites max, so conversations stay crisp. Pair with finger sandwiches and fruit wedges, arranged in tidy rows. You’ll watch guests relax, sip, smile, and even trade tips about the perfect tea-soak for a towel-sized cake. Your party ends with compliments and a refreshed, confident crew tonight.
Neon Signage With Vintage Fonts
A neon sign with vintage fonts isn’t just decoration—it’s a statement you can’t ignore. You’ll use bold font pairing to mix retro script with blocky sans, creating contrast that reads as clever and current. Place it behind the toast table or above the dance floor for instant focal drama. The glow sets a playful mood without shouting. Choose a sign with neon durability in mind: tubing that stays bright and steady after late-night selfies and enthusiastic embraces. Keep the color palette tight—two colors max, one for text, one for outline. For setup, prop the sign on a simple black wall or reclaimed wood, add a dimmer, and schedule a quick test run. You’ll thank yourself later. It’s modern, fun, and Instagram-ready for everyone watching.
Cocktail Dress Code Guide
First, you’ll want to nail the cocktail dress dos: tailor the fit, choose a length you can move in, and pick fabrics that photograph well. Color and fit tips follow: go with colors that pop in photos, consider classic black or jewel tones, and tailor sleeves and hem so you’re not tugging all night. Keep it practical: plan one go-to dress, a backup, and a few interchangeable accessories so you’re ready for any venue.
Cocktail Dress Dos
Step into the party with a dress that fits you, not a costume. You’re here to shine, not imitate last season’s vibe. Do pick a silhouette you can move in, then tweak it with fabric choices that feel like you—think structured crepe, sleek satin, or matte jersey. Keep hems midi or knee for ease during dancing, and add a spark with accessories, not a shout. Dos? Choose clean lines, carve shape with waist nips, and test comfort before you commit. Remember silhouette tips that flatter your stance; lift from the shoulders, avoid cling where you don’t want it. Be ready for photos, but stay comfortable enough to own the room. Keep the vibe playful, bold, and polished, never surrender to uncomfortable trends for night.
Color and Fit Tips
What color actually flatters you best? It’s not mystic magic, it’s contrast and undertones. You’ll choose a shade that aligns with your skin, hair, and confidence. For cocktail events, lean into color coordination: pick one bright accent against a neutral base, or go monochrome with a daring shade head to toe. Test under daylight and evening light, so your hue doesn’t clack or fade in photos. Fit adjustments matter as much as color. If the waist pinches, add a quick hemming; if the bust is loose, sew darts or add a thin strap. Opt for a dress that holds shape, not just sits on you. Prioritize a clean silhouette, flexible fabric, and comfort that lets you move, dance, and shine, without losing your edge.
Vintage Vanity Mirrors Setup
If you want a glam, cheekily nostalgic vibe, start with a couple of vintage vanity mirrors as the centerpiece. You’ll place them where photos happen, not hidden in a corner. Keep frames clean and facing outward, so reflections brighten the room. Use warm bulbs around the edges, not harsh overheads. Mirror placement becomes part of the vibe, not an afterthought for guests.
Next, control lighting reflections with simple lamps. Pick a dimmer, soft pink, or amber tones, and avoid glare on faces. Add a handheld mirror prop for quick selfies. Hide cords, keep surfaces clean, and leave space for guests to group up. Have wipes and a small makeup tray handy, so touchups stay quick and photo-ready. Your space will feel polished, and lively.
Classic Radio Broadcast Night
After the vanity glow, you’re basically halfway to a vintage radio vibe, so lean into a Classic Radio Broadcast Night with real-deal atmosphere. Set up a faux microphone, black-and-white photos, and a playlist of old-timey jingles to guide the energy. Practice clean studio acoustics by placing panels at strategic angles and avoiding echo-chamber jokes. Talk about broadcast ethics with your crew so everyone knows boundaries, consent, and vibes you won’t cross. Keep segments tight, scripts handy, and ad breaks on point, not pandering. Invite friends to host ridiculous faux radio ad reads, then roast them gently afterward. Capture the nostalgia with lighting that glows amber, not sterile, and snap photos for later. Your guests feel chic, curious, and oddly empowered by the broadcast vibe.
Route 66 Themed Scavenger Hunt
Ever wanted a road trip you can finish in one night? Good, because a Route 66 themed scavenger hunt fits that crave for speed and stories. You’ll map quick stops at mile markers, snapping photos, collecting tiny souvenirs from each roadside clue. Start at a classic diner, trade a challenge for a hint, then race to the next landmark with a timer. Keep teams moving: three clues per stop, no long pauses. Use goofy improvisation for clues that reference old ads, neon signs, and desert wind. Designate a route a bit open, so you don’t chase traffic. End at a retro motel lobby for a finale toast, then reveal the winning route with a wink and a cheer. Leave room for detours and bragging.
Glow Jewelry and Pearl Details
You can light up the party with glow jewelry—bracelets, necklaces, and rings that glow under blacklight or in daylight, depending on the moment. Pair glow pieces with pearl details for a chic contrast—pearl dangly earrings, pearl-accent chokers, or a subtle pearl bracelet to balance the neon. Try layering a glow piece with a classic pearl and set a quick rule: one statement glow item, one timeless pearl piece, and keep it cohesive with similar metal tones.
Glow Jewelry Trends
Why glow jewelry? Because you want a party that stays lit after midnight. neon glow meets clean lines for a look that’s bold without feeling gimmicky. Bracelets pulse under blacklight, pendants shift with the room, and earrings catch every flash on the dance floor. uv accents spark interest without shouting, turning simple outfits into event-ready statements.
Make it practical: choose adjustable pieces, rechargeable accents, and easy clasps. Preview daylight looks, then test under club lighting. Pick two or three signature pieces you’ll actually wear, not just display. Show them on a tray for photos, or tuck them into glow-friendly bags. If guests ask, brag that the glow elevates your vibe, not overpowers it. Keep the palette tight and the fit honest for a finish.
Pearl Details Glow
Pearl details can keep the glow vibe classy instead of arcade-y, so mix the two with intention. You’ll pair pearl shimmer jewelry with soft neon ribbons and candlelight for a retro-fresh vibe. Think layered pearl chokers with tiny LED charms and a bracelet stack that catches every selfie. Glow accents float on acrylic earrings, so the shimmer isn’t loud, it’s a whisper that says modern. Celebrate DIY charm: paint shells in metallic gloss, knot pearl beads into a bracelet, and stitch glow threads through the clasp for a hint of sparkle under party lights. Keep it simple: one statement piece per look, one glowing detail per table, one unforgettable moment. Your guests will notice the subtle shift and remember the glow long after tonight.
Pin-Up Photo Silhouette Studio
A Pin-Up Photo Silhouette Studio is your quick shortcut to bold, timeless glamour without a full-on photoshoot budget. You set up a small corner, pull in a lamp, a backlit curtain, and your best party vibe. You’ll guide guests through the pose stage with simple cues, and you’ll love the instant contrast on silhouette shots. Focus on silhouette techniques—sharp outlines, exaggerated hips, playful hand placements—and keep the faces hidden for classic mystery. Nail the lighting setup: a bright key light at 45 degrees, a soft fill to tame shadows, and a dark backdrop to pop shapes. Snap, review, tweak, repeat. It’s quick, cheeky, and poster-perfect for millennial glam without drama. You’ll leave guests laughing, with silhouettes ready for social posts that spark instant envy.
Mid-Century Modern Table Decor
Start with geometric centerpieces—crisp lines, low profiles, and bold shapes that don’t block the view. Pair retro tableware like avocado-green or teal plates with amber glassware, and keep colors tight: teal, orange, and mustard. Keep the look cohesive by repeating a single metallic touch (silver or gold) in napkin rings or candle holders.
Geometric Centerpieces
Geometric centerpieces are the clean, punchy backbone of a Mid-Century Modern table, and they’re easier to pull off than you think. You’ll use simple shapes to frame conversation and food without shouting for attention. Start with a low, mirrored tray; place geometric prisms and tell a tiny light story with candles or LEDs. Add a few tall brass stands for vertical variety, then pop in faceted glassware as drinking vessels to catch the room’s glow. Keep color minimal: clear glass, copper, or black accents. Group three to five pieces for balance, not clutter. You want clean lines, not chaos. Move pieces between courses, adjust height, and watch the room feel sharper, calmer, and somehow cooler. Your guests notice the confidence in the setup immediately.
Retro Tableware and Colors
Retro tableware is your ticket to that honest, lived-in Mid-Century vibe—bold patterns, chunky shapes, and colors that actually wake a room. You’ll mix and match atomic china with simple glassware, then pair it with a pastel palette that feels fresh, not dusty. Skip ultra-symmetry; lean into quirky mismatches that tell a story at the place setting. Your centerpiece can be a stack of low, glossy bowls or a single, sculptural plate leaning like a statement. Use matte finishes to ground the glow. For serving, go with modular platters and rounded cups that invite conversation. It’s bold, practical, and totally doable in real life, not a design show. You own this vibe. Keep extras simple: matching napkins, glassware, and a color map for guests tonight.
Retro Karaoke Night
In the living room, plug in the mic and cue the retro hits. You’ll host a slick, low-friction karaoke circle where every guest can shine without drama. Pick tight, themed playlists—think power pop, synth spikes, and disco dazzle. Curate your song selections with variety and pace, so the room breathes between bops and ballads. Mind microphone etiquette: hold the mic by the handle, pass it with a clean handoff, and avoid crowding the stage. Stage a quick warm-up or sing-along mirror to boost confidence. Keep the vibe social, not audition-night. Pack snacks, a simple lighting cue, and a sharable quick-changelog playlist for afters. Simple, bold, unforgettable — exactly what a millennial-bait night needs. Tonight, your crew leaves smiling, trash-toss-free, and already booking the sequel.
Drive-In Photo Booth Experience
If you want something Instagrammable without the fluff, set up a drive-in photo booth right in your driveway.
> Set up a drive-in photo booth in your driveway for instant Instagram-worthy memories
Keep a compact backdrop, like a neon lighting arch, and prop a portable tripod with a phone mount.
Ask guests to form a line, tap the shutter, and watch window reflections turn into candid movie stills.
Use bold prompts on a screen nearby—’squad,’ ‘sparkle,’ ‘last call for cake’—to guide poses.
Keep it simple: lighting from the arch, a few silly props, and a quick edit on your phone.
That’s it: Real memories, no drama, just shareable snaps before the cake.
Weave in a soft soundtrack, a timer, and a flag sign that says ‘Drive-In, Shine On.’
Keep it compact, quick, and totally you. No extra fuss.
Record-Inspired Guest Book
Make it a Vinyl Record Sign-In, turning your guest book into a vinyl keepsake by letting guests sign a real-looking record and drop a quick note.
Give them Groovy Guest Pages—short prompts, a couple of song picks, and room for a doodle or two.
Set up a simple display near the turntable, offer a Sharpie, and snap a photo when someone writes a message.
Vinyl Record Sign-In
Choosing a vinyl record sign-in is one of those bargain-small details that actually pays off later—you’ll love flipping it over and reading the notes. You’re crafting a keepsake that doubles as decor, so pick a record with personality. Have guests drop their signature grooves in the runout or on a blank sleeve, then snap a photo with the turntable spinning. Set up a small, stylish station: a Sharpie, a glass of bubbly, and a tray for dust jackets. Encourage friends to write brief messages, jokes, or wedding tips between the grooves. Afterward, display it like art—leaned on a stand or hung with a clip. This vinyl guestbook turns listening into memory, not footnotes, and it sparks future conversations, not clutter, for years to come.
Groovy Guest Pages
Why settle for a boring guest book when you can hand guests something they’ll actually want to sign? Welcome to Groovy Guest Pages, where your memories ride the record vibe. You’ll design guestbook customization that fits your party’s color, font, and groove. Think vinyl sleeves holding notes, plusPolaroid snaps? Yes. Keep it simple: a signature layout that’s easy to fill and hard to ignore. Guests swipe a groove, leave a one-liner, attach a photo, stamp a sticker, and move on. After the night, you’ve got a wall-ready timeline, not a messy pile. Actionable plan: pick three prompts, reserve a corner table, and provide pens that glide. This isn’t dusty claptrap — it’s a keepsake you’ll actually use. Your guests will brag, and you’ll smile.
Vintage Lipstick Swatches Station
Set up a Vintage Lipstick Swatches Station that screams retro and makes photos pop. You line up a row of tubes, label each shade with a quick note from your shade catalog, and invite guests to pose while you snap with a playful tilt. Keep it simple: matte finish swatches on matte cards, so reflections don’t steal the show. Offer a few bold reds, a few soft pinks, and a couple of daring nudes—so everyone can declare their vibe in one shot. Add a small mirror, a cleanup cloth, and a sign that says, Yes, you can borrow, no drama. It’s practical, imageable, and moment-ready for the feed. Set up clear rules, keep it tidy, and let guests critique with kindness through the day.
Milkshake Toast and Bites
How about a milkshake toast to kick things off? You scoop vanilla flavors into thick glittery shakes, then cheers with clinking cups. You keep it simple: one flavor, bold toppings, and a moment of wink-wink to your future self. Serve with straw garnishes—mint sprigs, tiny umbrellas, or a candy-coated straw that actually stays cold. You pair bites that mirror the shake: mini sliders? No, better: bite-sized donuts, pretzel bites with salted caramel dip, and cheesecake spoons. You present a station: copper mugs, metal trays, handwritten labels. You guide guests to sip, bite, and snap pics before the next game. You set limits, timing, and color palette, so chaos stays cute, not chaotic. You’re ready for a chic, playful toast. That’s how you own it.
Conclusion
If you’re hoping these ideas really boost the party, here’s the truth: nostalgia can lift mood, but only when you actually do it, not just read about it. Pick a few anchors—poodle skirts, jukebox hits, milkshakes—and commit to them. Prep a diner menu, set backdrop, and keep a tight schedule with your toast master. When you mix warm memories with real plans, you’ll feel the retro magic without turning the night into a museum tour.