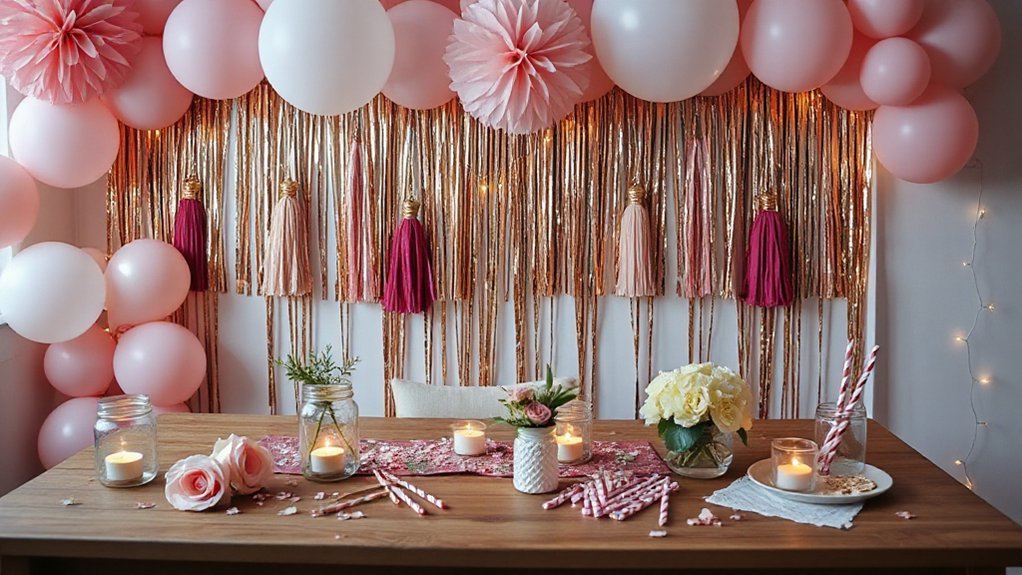
At Jenna’s bachelorette, you taped a glitter BRIDE banner over a $10 fringe backdrop, and everyone swore it was rented. You can get that glossy look on a shoestring with balloon garlands, tissue tassels, mini disco balls, and vinyl‑decal flutes, all under $50 a pop. I’ll show you what to buy, what to skip, and the cheap tools that matter most—so you don’t waste a dime—and the one trick that ties it all together.
Key Takeaways
- Personalized bride banner from glittered cardstock; split around obstacles; add stars or disco accents; keep gradient colors; under $20.
- Budget balloon garland using 12″ and 5″ balloons plus one metallic; cluster and attach to strip; finish with confetti ends; under $50.
- Fringe streamer backdrop on plastic tablecloth; overlap layers and add high-contrast stripe; flattering lighting and camera angle; quick afternoon, low cost.
- Tissue tassel garland and tropical cardstock leaf wall; batch-cut leaves, score veins, layer for depth; bold greens with gold accents; inexpensive, reusable.
- Mini disco ball centerpieces and glitter bottles; vary heights, add faux eucalyptus; stability shake test; vinyl flute decals applied with alcohol clean; hand-wash only.
Personalized Bride Banner With Glitter Letters
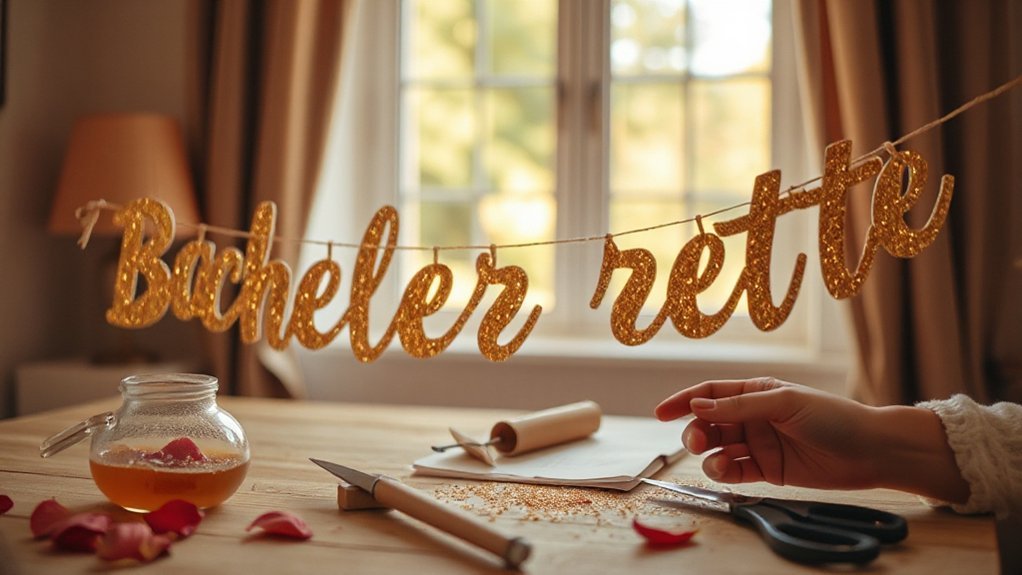
Start with the name that matters—BRIDE, BRIDE-TO-BE, or “JESS,” whatever she answers to—and plan a banner that actually fits the wall you’ve got, not the one in your head.
Measure the span, mark the hooks. Cut cardstock letters, brush on fine glitter, and seal them. Test Letter Spacing on the table so the name reads easy from across the room. Punch holes high so letters hang straight, then string with tiny knots for tidy gaps. Add Accent Shapes—stars, rings, a disco ball silhouette—at the ends and between words. Try a gentle color gradient, light to bold, so the name leads the eye. Snap a quick mockup pic, step back, and tweak before you commit. If a frame or outlet interrupts the line, split the banner and own it. You’re not guessing; you’re shaping the room around her moment. Keep it sturdy, light, and readable when lights go low.
Budget-Friendly Balloon Garland in Party Colors
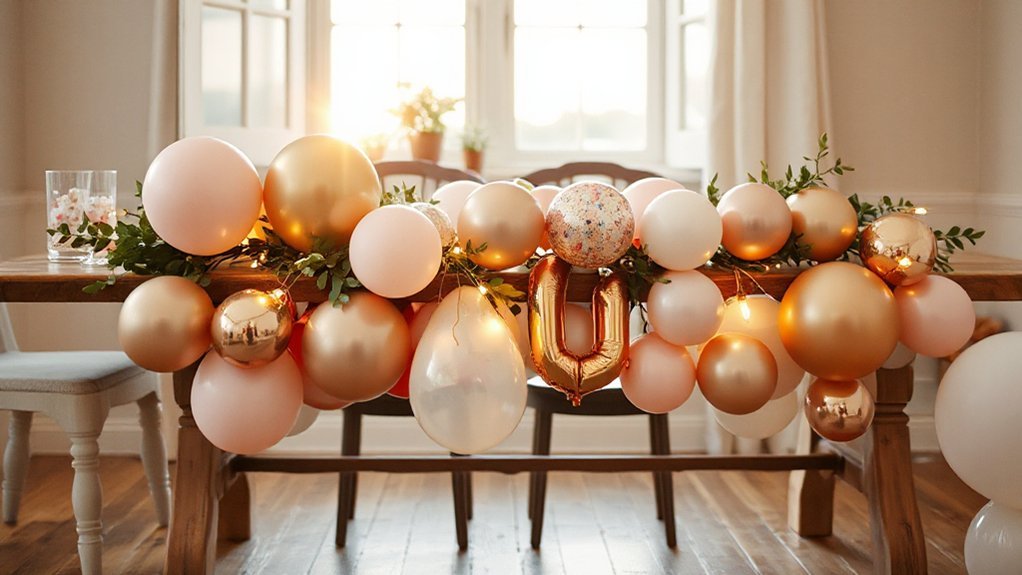
How do you pull off a big, happy balloon garland without burning the budget? Start with a tight palette—think three party colors plus one metallic—and let color coordination do the heavy lift, because when hues agree, everything feels fancy even if the receipt doesn’t. Grab two bags of 12-inch balloons, one bag of 5-inch fillers, a small hand pump, and a plastic garland strip or fishing line, all under $50 if you shop smart at discount stores.
Use simple balloon sizing: blow some to full, many to medium, and a bunch to small puffs, then knot them in clusters of three and four so the shape ripples like it cost more. Anchor the strip on removable hooks, thread the clusters, and tuck the tiny ones into gaps with glue dots, easy and tidy. Finish with metallic or confetti balloons near the ends—like little earrings, but for the party.
DIY Fringe Streamer Backdrop for Photos
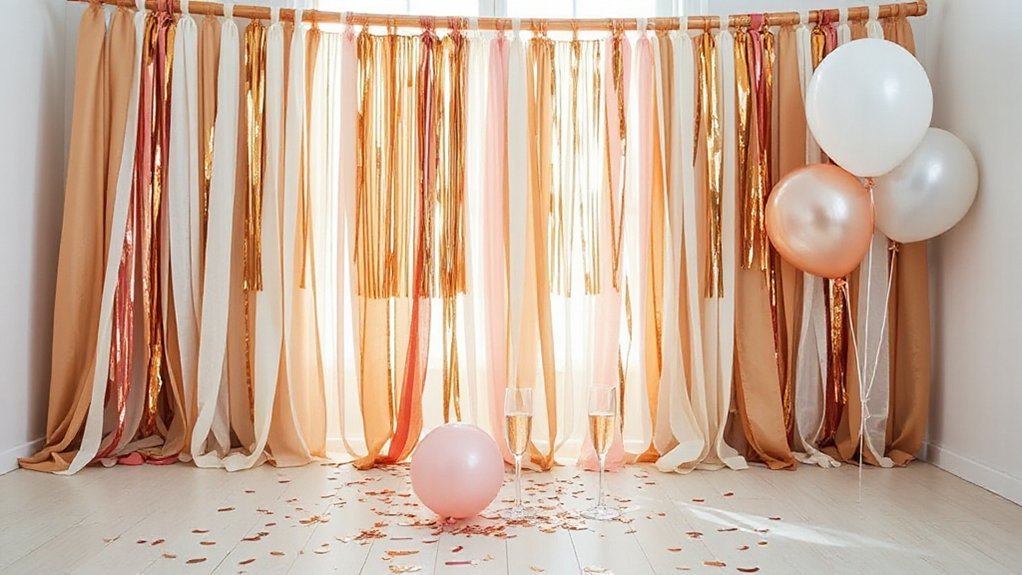
Layering fringe is the quickest way to fake a pro photo wall, and you can pull it off with crepe paper streamers, scissors, painter’s tape, and a cheap plastic tablecloth as your base so the whole thing moves in one piece if you need it to. Tape the cloth to a door, then run long streamer strips from bottom to top, overlapping like shingles, snipping little fringes along the edges so they sway when people laugh. Work in three or four colors, and keep a high-contrast stripe at eye level for crisp faces.
Before guests arrive, test lighting placement and camera angles. Put a lamp off to one side, not dead center, and shoot slightly higher than eye line for clean chins.
| Tweak | Why | How |
|---|---|---|
| Bottom-up layers | Fuller look | Overlap 1 in |
| Accent stripe | Pops faces | Dark vs light |
| Side light | Soft skin | Lamp 45° |
Test, tweak, smile.
Chic Tassel Garland From Tissue Paper
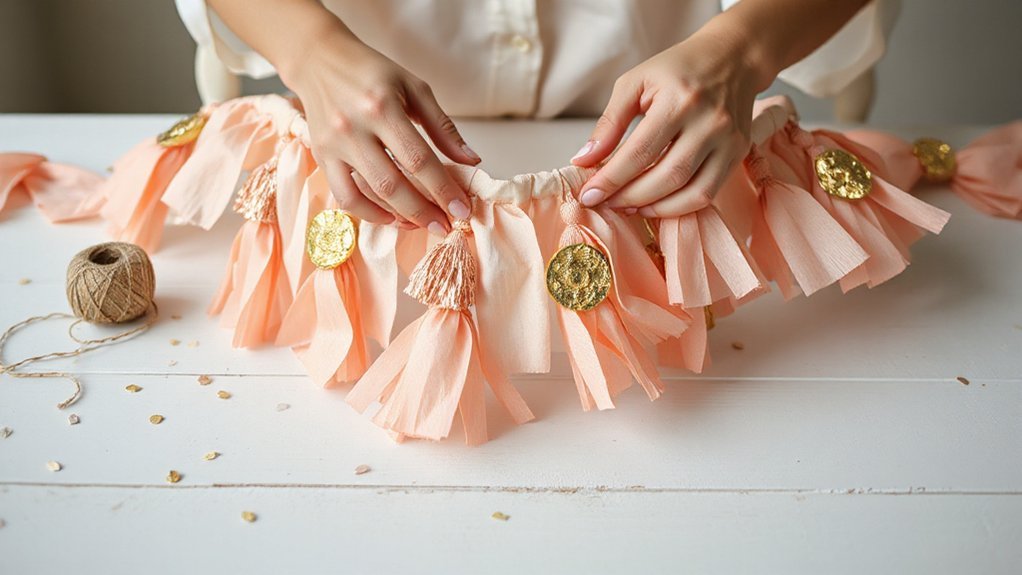
Turning tissue paper into tassels is one of those five-dollar, big-impact tricks you’ll use again and again, because it looks fancy and goes together fast without fuss. Fold a sheet in half, slice fringe up to a two-inch spine, open it, then roll the spine tight, twist the center, and loop it like a tiny handle; tape or dab glue to lock it. Thread ten or twelve onto twine, color-block them for a clean pop, or run an ombré line that glows in photos.
Use metallic flecks or a single neon tassel every third one, like a wink. Clip a tag with the bride’s initials, and drape the garland on the bar, the headboard, or the doorway that needs a little courage.
For storage strategies, coil the strand in a zip bag and hang it on a hanger. Later, pull single tassels for gift presentation or chair markers.
Mini Disco Ball Centerpieces With Faux Florals
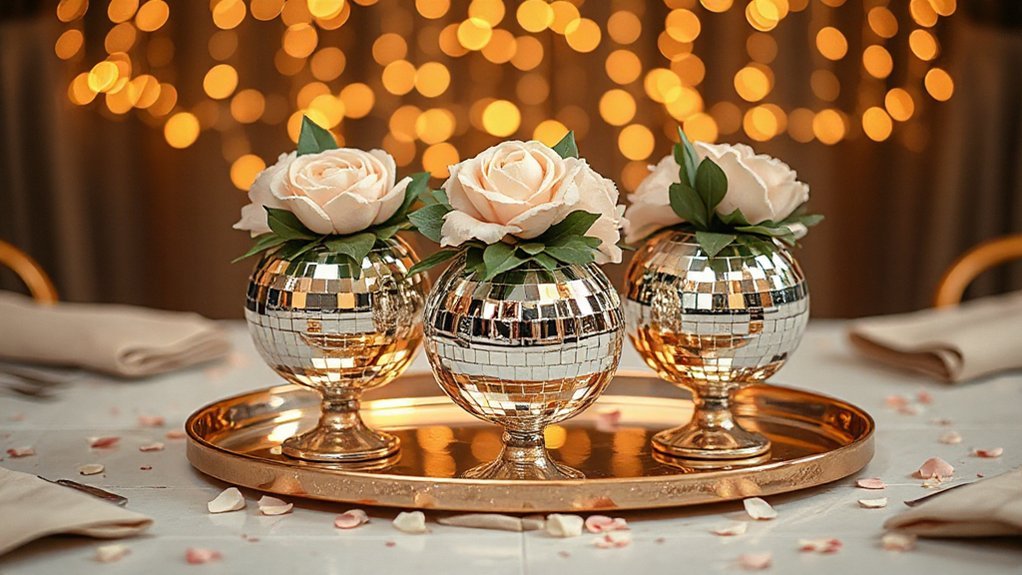
Why not let a few mini disco balls do the heavy lifting while faux blooms soften the shine and make the table feel full and happy. Grab three to five palm-size disco balls, nest them in a low bowl, and tuck in faux roses or eucalyptus, whatever reads party and doesn’t shed. A bag of mirror confetti under the bowl doubles the Lighting effects, bouncing dots on napkins when candles are lit. Vary heights with a cake stand or upside-down ramekin, Scale variations keep eyes moving without clutter. Stick to one color for flowers, then let the chrome do its job. Set one centerpiece per table, or cluster two on a banquet, and you’re under fifty if you shop dollar aisles and thrift shelves. Do a shake test, so nothing rolls when folks reach, and call it done; it looks intentional, a little glam, and honest-to-goodness low fuss.
Custom Vinyl Decals for Champagne Flutes
For decals that last, pick permanent vinyl made for glass, like Oracal 651 or Cricut Permanent, skip the “removable” kind, and use a light‑tack transfer tape so glitter or holographic films don’t tear, cut names around 1–2 inches tall so they fit the curve. Clean the flute with dish soap and then rubbing alcohol, no fingerprints or lotion, set the decal about 3/4 inch below the rim, make a masking tape hinge, burnish from the middle out, and if a bubble sneaks in, pop it with a pin and press it flat. Warm it with your thumbs, press the edges hard, let it cure 24 hours before icing or washing, hand‑wash only, because cheap vinyl slides off in the ice bucket while the good stuff holds through a long toast and a sloppy rinse—ask me how I learned.
Decal Materials Guide
A thin strip of gold vinyl can turn a plain flute into a keepsake, but the vinyl you pick matters more than the font. For glass, you want permanent adhesive vinyl, not wall stuff, with an outdoor‑rated acrylic glue that shrugs off cold drinks. Cast films hug curves better than calendered sheets, which can fight you on tight bends. Thickness tells a tale too: 2–3 mil feels sleek and sticks neat, while chunky craft rolls look clumsy. Finishes change the mood—matte reads modern, gloss pops in photos, metallics and holographics flirt with the light. Check if the liner uses biodegradable backings, a small win. Skip heat transfer substrates; they’re for fabric. Expect $2–$4 per 12×12 sheet, one sheet decorates a dozen flutes easy, honestly.
Application Tips and Tricks
Before you stick anything down, wipe the flute with isopropyl alcohol and a lint‑free cloth, then let it air dry, no shortcuts.
Mark a straight guide with a strip of painter’s tape, so your name sits level and not wandering.
Use transfer tape and a firm squeegee, push from center out, slow and steady, no bubbles invited.
Warm the glass with your hands if it’s chilly, vinyl likes cozy.
For Weatherproofing decor, seal edges with a thin line of dishwasher‑safe Mod Podge, wipe off extra.
Cure overnight, then hand wash only.
Transport hacks: nest flutes in a shoebox with dish towels and rubber bands, decals facing away from seams.
Bring a spare decal and tape, fixes happen, and your future self will grin later.
Sparkling Bottle Makeover With Glitter and Ribbon
Turning plain bottles into sparkly centerpieces is easier than it looks, and you’ll only need glue, glitter, and ribbon. Grab a couple of empties from recycling, wash them, and let them dry, since clean glass makes the shine stick and stay. Think through adhesive options before you start, since tacky glue grips fast, Mod Podge smooths edges, and a spray works when you need speed.
- Tape a clean line near the base, brush glue under it, then roll in eco glitter; tap off the extra, and let it cure while you sip water and admire the mess.
- Wrap the neck with satin ribbon, tie a firm bow, and add a tiny safety pin inside the knot so it won’t droop later.
- Want ombré? Layer fine glitter shades from dark to light, inch by inch.
- Finish with a clear sealant, light coats only, so bottles don’t shed on dresses.
Faux Neon Sign Dupe With LED Rope Lights
You’ll want a coil of LED rope light, a clear acrylic panel or foam board, clear clips or zip ties, a marker, painter’s tape, a few sticky hooks, and a small power strip you can reach without crawling under the table, trust me. Sketch simple letters or a heart on the panel with the marker, then bend the rope along the lines in smooth curves, tape it in place as a dry run so you can fix weird kinks before they become “why does that S look angry.” When it looks right, lock it down with clips or zip ties, keep bends gentle near corners, tuck the cord along the edge with sticky hooks, and park the plug where it hides behind a plant or gift bag so it looks neat and you’re not tugging wires all night.
Materials and Tools
A clear acrylic sheet, a coil of LED rope light, and a steady hand will carry this project most of the way. You’ll also want clear zip ties, a low-temp hot glue gun, painter’s tape, and a fine-tip marker for sketch lines. Keep Safety Gear close: nitrile gloves, eye protection, and a dust mask if you drill. For Tool Maintenance, stash alcohol wipes to clean the rope light jacket and a soft cloth for the acrylic, because smudges steal shine.
- Clear acrylic sheet (18×24), film on until the end.
- LED rope light, warm or pink, plus matching power adapter.
- Low-temp glue gun and sticks, zip ties, painter’s tape, marker.
- Small drill, 1/8-inch bit, microfiber cloth, alcohol wipes, extension cord.
Ready.
Shaping and Mounting
With your gear laid out, it’s time to bend light into words. Print your phrase at full size, tape it to the table, and lay the LED rope along the lines, easing curves with slow hands, not sharp bends. Build simple wire frameworks to hold the shape, think coat hanger or garden wire, and zip‑tie every three inches so the rope doesn’t wander. For soft backing, try foam shaping on a foam board, cut channels with a craft knife, and press the rope in so it sits flush. Dry‑fit the whole piece, then mount to acrylic, plywood, or foam with clear clips and a thin bead of silicone. Add strain relief near the plug, hide the cord path, and test glow before the party.
Tropical Leaf Wall Using Paper Cutouts
Turning a blank wall into a lush tropical backdrop is easier than it looks, and it won’t eat your budget or your afternoon. You’ll cut simple monstera, palm, and banana leaves from cardstock, stick them up with painter’s tape loops, and build Color blocking, so the greens don’t blur. Think dinner-plate leaves at the bottom, smaller ones up top, and Layered foliage where edges overlap like real plants do, casting shadows that make guests look twice.
- Trace three leaf shapes on cereal box, then batch-cut cardstock stacks for speed and clean curves.
- Score veins with a butter knife, fold soft creases, so the paper bows and catches light like fresh growth.
- Tape a rough grid, hang big leaves first, then tuck mediums and minis to fill gaps with tidy depth.
- Pop in surprise tones—lime, deep emerald, and one neon—plus two glossy gold leaves, sparingly, for snap in photos.
Boho Pampas and Dried Flower Arrangement
Gathering pampas plumes, bunny tails, and dried palms feels like hauling in a sun-baked field and setting it on the table, and it sets a boho mood fast without fuss. You’ll spend under fifty if you thrift a wide-mouth vase, snag a mixed bundle online, and split stems across two or three arrangements. Start with a simple grid of tape across the vase, then build in texture layering: tallest pampas in the back, palms for shape, bunny tails and grasses to soften the edges, a few seed pods for grit. Spin the vase as you work and keep odd numbers; it feels natural, like a breeze did the styling. Seal the plumes with a light hairspray so they don’t shed. Play with seasonal variations—bleached ruscus in spring, rust reeds in fall, wheat anytime. Forage kindly, trim at angles, and save leftovers for bar cart minis; nothing goes wasted.
Sequin Table Runner for a Glam Tablescape
You want that glam sparkle without a painful tab, so check the cheap spots first: grab a 12×108 sequin runner online for under fifteen bucks, rent one from a party shop for a fiver, or snag remnant sequin fabric at the craft store and hem it with iron-on tape, which is just fancy stickers for fabric. Pick colors that play nice with what you’ve got—gold warms up blush and ivory, rose gold loves soft pinks and candlelight, silver pops with black-and-white, and a deep emerald or navy runner makes simple white plates look rich on the spot. Measure your table and let the runner hang 6–12 inches on each end, shake the sequins outside before you set it, and lay a thin cotton strip under it so it won’t scratch the table—sequins are glitter’s tidier cousin, but they still have opinions.
Budget-Friendly Sourcing
If you want that glam sparkle without the scary bill, start by shopping smart for a sequin table runner. Skip big-box impulse buys and think like a set stylist. You’re hunting sturdy fabric, clean stitching, and edges that won’t shed.
- Check Community swaps; post your date, offer cookies, borrow the runner, return it pressed.
- Hit Surplus outlets and liquidation stores; $10–$15 runners show up beside oddball props.
- Browse thrift and resale apps; search “sequin runner,” filter by “like new,” message for real edge photos.
- Ask party rental houses about clearance bins; stained stock gets marked down, and oxi soak fixes a lot.
Test sparkle under lamp light, tug a seam, and you’ll know it’ll survive the toast. Keep receipts, in case stitching misbehaves later.
Color Palette Picks
Before you lock in that sequin runner, pick a tight palette so the sparkle looks intentional, not like a craft drawer exploded. Start with Mood Mapping, ask how you want the night to feel, cozy glam or bold pop, then pick three colors that carry that mood. Let the runner be your metal, say rose gold, and pair it with one deep anchor like midnight navy and one soft calm like blush. Use Contrast Theory like a good neighbor rule, shiny next to matte, dark next to light, so each piece reads clean. Test on one place setting, napkin, plate, candle, runner, and see if it hums. If it fights, swap the blush for cream, no drama, just tidy. Your photos will thank you.
Ring-Themed Balloon Bouquet With Confetti
Picture a cluster of white, gold, and clear balloons tied tight like a bouquet, with a big foil diamond ring balloon shining on top and chunky confetti floating in the clear ones like soda bubbles that don’t quit. You can build this under fifty bucks if you mix discount store finds with a ring foil, and it’ll look luxe. Plan transport logistics, bag the bunch, belt it in, and inflate the ring on site. Mind inflation timing, since helium dips fast, and a touch of air keeps confetti stuck.
Luxe white, gold, and clear bouquet with ring topper—budget build, smart transport, lasting sparkle
- Use a hand pump for clears, then charge them on cotton so sparkle sticks.
- Layer sizes—5, 9, 12 inch—for depth, with two tiny 5s up front.
- Tie trios with fishing line: one gold, one white, one clear, then ribbon once, not thrice.
- Anchor with a wrapped soup can or thrifted holder; neat, steady, photo-ready.
Bride’s Chair Sign With Ribbon and Eucalyptus
You’ll need a small sign (cardstock or a thin wood plaque), a roll of satin ribbon, a few sprigs of eucalyptus (faux lasts longer), a paint pen, and some floral wire or zip ties, and you can keep it near $10–$20 if you watch craft store sales and use ribbon you already have. Loop the ribbon over the chair back and tie a snug bow, tuck in the eucalyptus and wrap it with floral wire, then add a tiny zip tie or a clear command hook under the seat so the sign doesn’t swing like a porch door in the wind. Before you buy, measure the chair back and check if it’s round, flat, or chunky, because that decides if you need extra ribbon, a second tie point, or a bit of painter’s tape for backup.
Materials and Cost
A few simple supplies turn a plain chair into a “Bride” throne for less than the cost of takeout, and you won’t need fancy tools. You’ll shop the basics, keep the total under $50, and still get that lush, modern look.
- Sign base: white cardstock or a thin wood plaque ($5–$12).
- Lettering: a gold paint pen or vinyl letters ($4–$9).
- Ribbon: satin or chiffon, 2–3 yards ($6–$10).
- Eucalyptus: fresh bundle or faux stems ($8–$15).
Buy at a craft store to skip shipping costs, and watch for coupons that shave off few bucks. For eco alternatives, try recycled cardstock, thrifted ribbon, or eucalyptus you can compost later, and reuse faux greens. Split multi-packs with a bridesmaid, and you’ll land $28–$38, easy.
Attachment Methods
With the supplies in your bag, it’s time to fasten the sign so it stays put and looks clean from every angle. Loop ribbon around the top slats, tie square knots, and tuck tails so the bow stays crisp. Slide in two eucalyptus sprigs under the ribbon, stems down, and tape the stems on the back. If the chair is slick or the wind kicks up, add safety pinning through ribbon into the backing. For rentals or no-fuss setups, binder clips grip the lower rail and hide under the sign. They pop off fast.
| Method | When to use |
|---|---|
| Square knot tuck | Clean front, fabric ribbons |
| Safety pinning | Windy patios, bumpy rides |
| Binder clips | Rental chairs, fast teardown |
| Painter’s tape assist | Hide stems, protect finish |
Acrylic-Style Welcome Sign With Printable Lettering
Turning a plain frame into an acrylic‑style welcome sign comes down to a clear panel, a printed template, and a steady hand, no fancy gear or midnight wrestling with a cutting machine. Slide a sheet of clear acrylic or a thrifted glass insert into a frame, tape your printed lettering behind it, and trace with an oil‑based paint pen. Keep letter spacing roomy so names breathe, and if your hand wobbles, pause, lift, and restart; nobody’s grading penmanship tonight.
- Print your template at 110%, center it, and tape edges so it won’t creep.
- Degrease the panel with alcohol, then trace slow, pulling lines toward you; smudges wipe wet.
- Outline first, let it set, then fill; add drop shadows with a lighter color.
- Finish with edge gilding using liquid gold leaf on the panel rim for a quiet glow.
Under $20 in supplies, and it photographs like custom work.
Photo Booth Prop Set Printed at Home
You pick a ready template pack that fits your vibe—glam gold, retro disco, or cheeky champagne—and swap in names and dates so the props feel like your crew, not random internet stuff. You print on sturdy 80–110 lb cardstock at actual size on high quality, use matte if you hate glare in photos, and test one page first so you don’t burn ink at midnight. You cut with a craft knife and a metal ruler for clean edges, hot-glue bamboo skewers on the backs with a small cardstock brace so they don’t spin, and stash the finished pieces in a shoebox so they don’t get bent on the way to the party.
Templates and Themes
How do you make a photo booth look pulled together without spending a fortune? You start with smart Templates and Themes, because a clear look saves time, trims chaos, and makes pics feel like a story, not a yard sale. Do quick Theme Naming that matches the bride’s vibe—Desert Disco, Cozy Camp, Neon Noir—and let that steer prop shapes and bubbles, then tie it to your Invitation Templates so guests know the mood.
- Pick a color trio and one metal, and stick to them across props.
- Choose six core icons, plus two wildcards, so you don’t drown in options.
- Write a one-page prop voice guide, short, cheeky, clean.
- Map a simple backdrop logic that echoes your icons and colors too.
Paper and Printing
A solid photo booth prop starts with paper that can take a joke and a tight grip, so reach for 80–110 lb cover cardstock (about 216–300 gsm) that won’t flop or curl when the room gets warm.
Choose bright white, not glossy, so colors pop and cameras don’t catch glare.
Run a nozzle check, align the heads, and match paper weight in the driver.
If magenta leans orange, do quick print calibration with a small grid and nudge until skin looks human.
Print at 100% scale, no fit-to-page, and leave a clean margin for handling.
| Setting | Why it matters |
|---|---|
| Paper Type | Prevents curl, keeps colors sharp |
| Print Quality | Reduces banding, richer blacks |
Let pages dry ten minutes, stacked with sheets between to avoid scuffs.
Cutting and Assembly
Trimming clean edges comes first, so slide those dry prints onto a cutting mat and make slow, light passes with a sharp craft knife along a metal ruler, rather than trying to muscle it in one go with dull scissors that chew corners. Tape props to cardstock backs for stiffness, then score fold lines with the back of the blade, steady, like drawing a road.
- Follow Safety protocols: cap on when you pause, fingers outside the ruler’s edge, cuts away from you, every time.
- Brush thin glue, press from center out, smooth bubbles with a store card.
- Stick bamboo skewers or dowels, then tape a brace across neck.
- Quick Tool maintenance: wipe glue, snap dull tips, and square the mat.
Everything dries flat, handles sit solid, and your camera loves those crisp lines.
Streamer Ceiling Installation With Hanging Stars
Stretching streamers across the ceiling turns a plain room into a party sky, and the hanging stars seal the deal. You’ll map the room first, note vents, lights, and Venue Restrictions, then pick a center point, like a cheap plastic hoop or a Command hook, and run lines out like sun rays. Use painter’s tape on clean edges, press hard, and tug once to test, because loose tape fails right when the music kicks.
Map the room, pick a center, tape tight, then spin streamers into a party sky.
You’ll climb steady, not brave, using simple Ladder Techniques: three points of contact, tools in a pouch, and a buddy to spot and hand strips, no hero moves. Cut star garlands at mixed lengths so they sway but don’t bonk noses, and weight the ends with paperclips if the AC’s feisty.
| Secure corners | Painter’s tape, low residue |
|---|---|
| Crisscross runs | Start from a center ring |
| Hang star lines | Alternate lengths for depth |
Clean up scraps.
DIY Marquee Letters From Cardboard and Fairy Lights
Building bold marquee letters from shipping boxes and a strand of fairy lights is easier than it looks, and it hits that big‑night vibe without renting half a theater. You sketch big block letters on cardboard, cut two of each, then rim them with strips to form shallow boxes, like little stages. Add Sturdy supports on the backs with scrap triangles, so they stand tall and don’t wobble when the music does.
- Mark bulb holes with a dime, spacing even, and poke them clean with a pen so the lights seat snug.
- Push bulbs through from the front, tuck wires inside, and tape paths tidy, like cable lanes.
- Hide Battery boxes in the bottoms, cut a flap for switches, and label them so you aren’t fishing later.
- Paint the faces matte for glow, or cover with foil for pop; both bounce light well and photograph kind.
Party ready.
Confetti Bar With Mix-And-Match Sprinkles
Set out a confetti bar where guests scoop their own mixes—think tissue dots, foil stars, tiny hearts you punch from scrapbook paper, and a pop of the bride’s colors so every handful looks on-theme and a little personal. Use clear mason jars with wide mouths, small bowls for the fancy bits, and simple scoops or measuring spoons, plus paper treat cups so folks don’t fist-grab like it’s birdseed. Keep a runner or shallow trays under the jars, mark a “toss zone” for photos, and stash a lint roller, hand broom, and a box for quick sweep-ups, because confetti travels like it’s got somewhere better to be.
Custom Confetti Mixes
Mixing your own confetti is like a candy shop for grown-ups, and you can set up a simple confetti bar that looks cute and works hard without costing much. Pick a color story tied to your bride’s vibe, then build mixes that feel polished, not busy. Go for Biodegradable blends so you can toss freely and not fret the cleanup. Play with Texture combinations—matte paper dots, metallic shred, tiny tissue stars, even punched leaves, because contrast makes every handful pop. A smart mix follows ratios, not guesses, and that’s where a simple plan saves you time.
- Base: 60% paper circles for float.
- Shine: 20% foil for photo sparkle.
- Accent: 15% themed shapes for story.
- Zing: 5% petals or micro pompoms.
Display Jars & Scoops
You’ve got your blends sorted; now give them a home that’s easy to scoop and nice to look at. Use clear glass jars in three sizes, big for base mix, medium for color pops, tiny for sparkle bits, so your guests can read the layers like a candy shop window. Clip small metal scoops to ribbon loops on each lid, and add one wooden funnel to keep sprinkles in the jar, not on the table. For Label Organization, stick simple tags—name, vibe, and a one-line note like “biodegradable” or “bold shimmer”—so no one guesses. Mind Serving Hygiene; one scoop per jar, no sharing, and a small tray to catch drips. It feels tidy, and your bar looks grown-up. Simple, neat, and party-ready tonight, guaranteed.
Setup Tips and Cleanup
Before guests roll in, walk the table like a coach, laying down a runner or a strip of kraft paper as your crumb catcher, then build a left-to-right flow: empty cups or cones first, jars in the middle, and a clear landing zone at the end for finished mixes. Set a brisk setup timeline: ten minutes to stage, five to label, five to test scoops so sprinkles don’t clump. Park bowls for trash and a broom, and mark cleanup stations with tape dots so helpers know where to swoop when the toast hits.
- Stash extra cones under the table.
- Keep wipes and a lint roller by the landing.
- Swap messy jars early; top off quiet ones.
- Finish with quick sweep.
Drink Stirrers and Toppers With Metallic Cardstock
A stack of shiny metallic cardstock turns plain drinks into party-ready in about ten minutes, no kidding. You trace a few lips, stars, or cheeky rings, cut them clean with sharp scissors, and tape or hot-glue them to wood skewers or reusable acrylic sticks, and the glasses look dressed instead of shy. Mix rose gold, champagne, and onyx, then punch texture with quick foil embossing, which looks fancy but takes one pass through a handheld roller, no sweat. Seal edges with a swipe of clear-drying glue so they don’t shed flakes into the cocktails.
Keep it smart and safe, too, because you’re serving people, not a mood board. Follow food-contact safety standards: keep glue lines above the rim, leave at least two inches of bare stick, and skip glitter. Test one in a glass of water, swirl, dry, and tug; if it holds up, you’re to batch twenty.
Bud Vase Cluster Centerpieces From Thrifted Finds
Those dressed-up drinks set the mood; now let the tables tell the same story with little bud vase clusters you build from thrift store finds that cost less than a takeout salad. Hit the glass aisle and grab skinny bottles, salt shakers, tiny jars, and one wildcard shape, all for a few bucks. Wash them, pull off labels, and you’ve got a quirky set that looks planned, not pricey.
- Aim for Height Variation: pair a tall bottle with mid and short vases, so stems stagger and look lively.
- Play with Texture Mixing: ribbed glass, milk glass, clear smooth, a brass bud vase if you score one.
- Keep blooms simple: one type per cluster—carnations, ranunculus, or herbs—so the table reads calm.
- Ground the group: set vases on a thrifted book, a mirror, or a scrap tile, then sprinkle tea lights.
Tuck clusters along the table.
Polaroid Guestbook Photo Wall With Washi Tape
Kick things off by setting up a simple photo wall that doubles as your guestbook, so folks snap a pic, jot a note, and stick their memory right on the wall where everyone can see it. Grab an instant camera, a stack of film, a Sharpie, and three rolls of washi tape with bold washi patterns, and claim a clean stretch of wall that gets good light. Hang a title strip at eye level, like “She Said Yes,” then run two rows of twine for overflow, because this thing fills up fast. My placement tips are simple: cluster day-one friends on the left, new crew on the right, and keep the couple’s family centered like anchors. Tear tape into little corner brackets, press the corners firm, and overlap edges to keep curls down. Add a legend card with pose prompts, like “Throw the bouquet,” and keep tape handy.
Custom Party Favor Tags and Stickers
While the cupcakes cool, you can knock out custom favor tags and stickers that make the whole spread look pulled together without spending much. Grab a pack of kraft tags, a sheet of blank sticker paper, and a design app, then set your tone with Personalized Fonts and simple Color Matching to balloons or the bride’s sash. Print at home, trim with a paper cutter, and punch holes, and you’re halfway to polished.
- Pick one icon that tells your story, like a disco ball or a ring, and use it on every tag and sticker.
- Keep colors tight, two shades max, the good stuff pops and nothing fights.
- Add a short line, like “Bride’s Night In” or a date, and keep the font big enough to read at arm’s length.
- Layer stickers on favor bags, bottles, or lip balm tins, and call it done.
Table Number and Place Card Printables
Print yourself a clean set of table numbers and place cards, and the whole room suddenly looks planned on purpose, not patched together. You grab a modern template, swap in your theme colors, and print on 100‑lb white card stock, which feels sturdy without eating your ink. Number tables bold and big, then add names in a simple font so folks can read them in low light, because Seating etiquette only works when people can see. Do a test sheet, check margins at half an inch, and cut with a craft knife and a metal ruler so edges stay straight. Clip cards into tiny binder clips for stands, or slide them into dollar-store clear frames, and you’re set. If names are tricky, tuck in Pronunciation cards right under the place names, friendly and small, which saves the toast from stumbles. A QR code to the menu? Why not.
Heart and Diamond Garland Using Felt Shapes
With the seating all squared away and names easy to read, give the room a soft sparkle that doesn’t shout by stringing up a heart-and-diamond garland made from felt. You’ll cut simple shapes, stack colors that play nice, and stitch or glue them into a strand that looks custom without costing more than a takeout pizza.
- Trace hearts and diamonds onto stiff felt with a chalk pencil, then cut smooth, curves so the edges look store-bought.
- Use quick Stitch Techniques: a straight running stitch down the center, or tiny whipstitches at the corners, and leave a finger’s width between shapes so the line breathes.
- Thread shapes onto twine or fishing line, knotting stops so pieces don’t slide, and mix matte felt with one glitter piece every fourth spot.
- Hang with removable hooks; Safety Tips: mind scissors, keep needles capped, and test weight, gently tug.
Ring-Shaped Piñata Covered in Tissue Fringe
Turning a cardboard box into a giant “ring” piñata is one of those wins where a few cheap supplies pull more oohs than the fancy stuff. You cut two donuts from the box, tape a bridge between them for depth, and leave a flap so you can add candy, then you wrap the edges with masking tape so nothing snags. For structure that holds, you use reinforcement techniques: extra cardboard ribs inside the band, crisscrossed string under the top, and a loop of webbing for hanging, not just tape that quits when cheering starts.
Now for the sparkle, you fringe tissue in one-inch strips and layer it like shingles, gold on the “stone,” white on the band, and you keep the cuts shallow so the fringe sways but doesn’t shred. After the party, stash what’s left in reusable storage, or patch it and hang it again, no shame.