You want a bachelorette cake that stops the room, not just sits there, so think champagne-drip glam, neon Vegas pops, or a cheeky confetti core that spills when you slice, and match flavors that make sense, like lemon-raspberry for summer or chocolate-salted caramel for late nights. Ask for color swatches, proof photos, and a delivery plan, chill the buttercream, check black dye won’t stain teeth—then here’s the trick no baker tells you upfront…
Key Takeaways
- Champagne-drip or disco-ball metallics deliver photo-ready sparkle; match swatches to outfits and keep cakes cool to prevent sliding drips and dust clumping.
- Playful confetti cores wow on the first slice; control palette, mix textures, and plan a center-cut reveal for a dramatic sprinkle spill.
- Modern minimal monochrome suits black-tie vibes: razor-sharp edges, subtle ridges, single bold bloom, and confirmed non-staining blacks for clean photos.
- Bold themed options—Neon Vegas or retro Y2K—pop under lights; limit colors, order custom elements early, and provide labeled sketches for precise placement.
- Tropical/boho cakes feature hibiscus, palms, pampas, and sunset coral; pair with coconut-lime flavors, secure non-edible stems, and use warm lighting for photos.
Champagne-Drip Glam

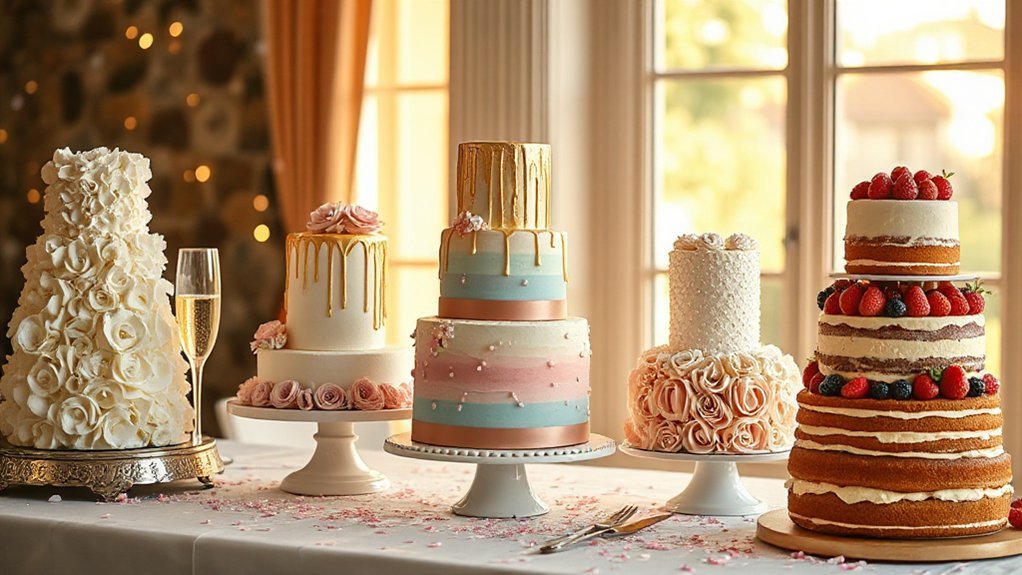
Starting with sparkle you can actually taste, a champagne‑drip glam cake looks like a toast in frosting form, with smooth white or blush buttercream and a glossy gold drip that catches light like jewelry and makes photos pop without trying too hard. You pick the shape, keep edges clean, and let the gold run like sunrise, and you’ve got a centerpiece that says celebration without shouting. Ask your baker for a sparkling ombre fade from ivory to blush, and tuck in tiny pearl accents like bubbles rising in a flute. If you want flavor to match the look, go vanilla bean with a hint of citrus and a splash of non‑alcoholic bubbly syrup, bright but not boozy. Bring a swatch of the bride’s dress or nails so the tones land right, because close counts in pictures. And carry it cool, since warm rooms make drips slide like summer.
Cheeky Confetti Layers
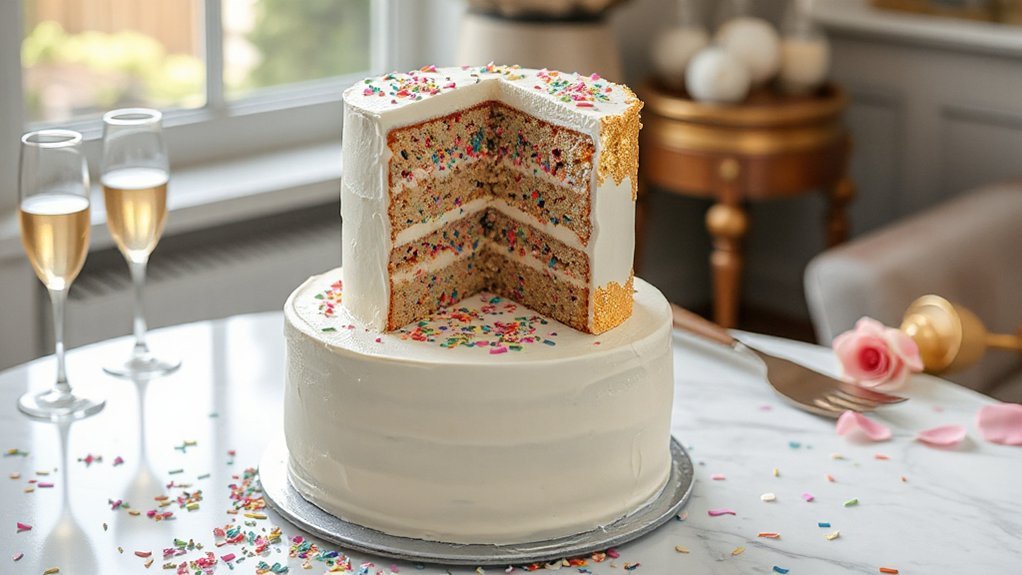
For Cheeky Confetti Layers, you’ll play up the outside with playful sprinkle patterns that read bold and tidy, think thick side bands, polka-dot trails, or a cheeky ring-of-hearts around the base so it looks fun and not messy. Press the sprinkles into soft buttercream so they stick, mix sizes for texture, and keep the palette tight—say hot pink, coral, and white—so it feels flirty but still clean. Then hide a confetti core in the center with a tunnel of sprinkles or mini candies that spill when you cut the first slice, and you’ll get that big “oh wow” moment without fuss, just plan the same colors inside so it looks pulled together.
Playful Sprinkle Patterns
Why not let the cake wear the confetti so you don’t have to sweep it up later? You can steer sprinkles like a designer, using Pattern Mapping to lay stripes, chevrons, or a loose galaxy drift that wraps the tiers. Go bold on Texture Contrast, mixing crisp jimmies with soft sanding sugar and a few glossy pearls, so every slice looks lively and feels different under the fork. Press sprinkles into a chilled buttercream band for clean edges, then scatter a fade above and below, like good jeans with honest wear. Test your palette on a parchment strip first, check spacing, and lock it in. A tiny offset spatula, a sieve, and patience beat chaos, every single time. Less mess, more pop, zero apologies.
Hidden Confetti Core
Hiding a confetti core is the kind of low-lift trick that gets big squeals, and you don’t need fancy tools, just a steady hand and a plan.
You’ll bake three 6-inch layers, chill them, and punch a 2-inch hole through the middle two with a cutter. That’s your tunnel. For Core Mechanics, pipe a buttercream dam around edge, stack the first cored layer, fill the tunnel with sprinkles, chocolates, and a pinch of edible glitter, then cap it with the second cored layer and the top. Press gently, chill ten minutes, then crumb coat. A thin ganache drip hides seams. For Reveal Timing, cut a tidy wedge, not a sliver, and aim center. Hand the first slice to the bride, then watch the pour.
Modern Minimal Buttercream

For a modern minimal buttercream, you stick to a sleek monochrome palette—think ivory on ivory, black on black, or a deep emerald that looks rich without shouting, like a good dress you’ve worn twice and no one noticed. Keep the lines clean and the textures tidy, with razor-sharp edges, smooth sides, and small, controlled moves like tight horizontal ridges or a few palette-knife swoops—no big swirls that sag in the car, learned that the hard way. Pick one color, play with matte and gloss, add one honest detail like a single sugar anemone or a tiny acrylic tag, and you’re done, steady and chic without the frill.
Sleek Monochrome Palettes
Even when the party’s loud, a sleek monochrome cake speaks up in a calm, confident voice. You pick one color, then let it do real work, and that’s where Matte finishes and Tonal layering come in, like good lighting that flatters without showing off. Think coal black buttercream with softer charcoal shadows, or milk white with warm ivory whispers, so the cake looks rich and steady from any angle. You keep toppers sharp and simple, maybe a silver date or a tiny sugar bow, nothing that yells. Flavor still matters, so match deep cocoa with espresso syrup, or lemon with a hush of vanilla bean, and you’ll feel that clean snap when you slice, tidy crumb, no fuss, just intent from baker to bride.
Clean Lines and Textures
Keeping your buttercream clean and calm starts with straight basics: level your layers, crumb coat thin, then chill till the cake feels firm, not frosty. You’ll smooth with a tall scraper, keep your wrist steady, and let the turntable do the slow work. Aim for Sharp Silhouettes, edges that catch light like a smart suit, and use Subtle Scoring to add hush-quiet texture without busy fuss. It’s modern, it’s calm, and it holds up when the room gets loud.
- Razor edge rim casting a slim shadow at dusk.
- Sidewalls straight you could sight a line down them.
- Thin vertical rakes that feel like linen, not corduroy.
- A single offset ridge circling like a record groove.
- Matte buttercream, then one glossy swipe for a wink.
Photo-Real Printed Stunners
A crisp selfie or that beach sunset from your last girls’ trip can land on the cake looking shockingly real, thanks to edible ink printers and sugar sheets. You bring a sharp photo, and we frame it with a clean border so edges don’t curl. We do printer calibration before every run, because skin tones can slide warm and water blues can go muddy fast. Soft shade beats harsh noon, and a quick dust-off of stray hair saves cleanup later.
For substrate choices, frosting sheets lay smooth and vivid, great for portraits, while wafer paper stays thin and crisp for logos and text. We chill the cake lightly, then float the print on buttercream, press once, and walk away. Ask for a test proof, approve colors, and plan for a message strip. Transport flat, box tall, and keep it cool, not cold, or condensation will spot the image.
Neon Vegas Vibes
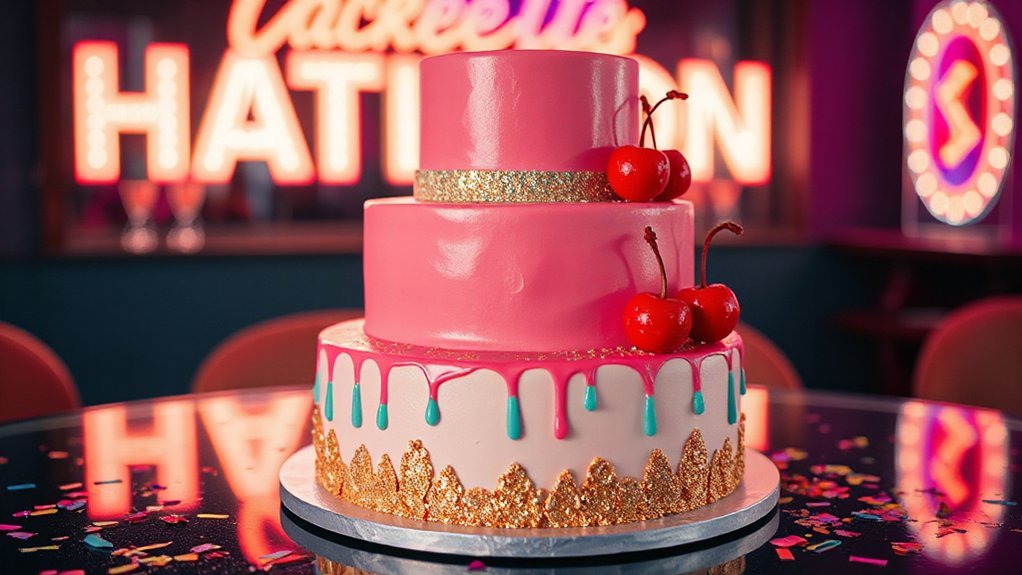
When you’re done playing with photo prints, flip the switch to Neon Vegas vibes, where the cake looks like a strip-side sign and the colors shout over the music. You want glow, not glare, so ask for buttercream edges and fondant panels that hold Neon Signage piping. Add edible glitter, and wafer paper arrows that point you to the fun.
- hot pink tubes spelling BRIDE
- black velvet tiers with chrome trim
- tiny sugar Slot Machines, spinning fruit reels
- crisp dice corners like the felt table
- a topper that glows under UV at the bar
Order early, because custom lights take time, and share a quick sketch with your baker, nothing fancy, just boxes and arrows that show where the zap should hit. Keep the palette to three loud colors and one quiet base, and you’ll get a cake that cuts clean and photographs even cleaner in dark rooms.
Beachy Tropical Florals
You set the beach tone fast with hibiscus and palm accents, cutting fondant leaves with clear veins or brushing on buttercream fronds that wrap the tiers like shade on a porch, and a single bold hibiscus up front says “party” without yelling. Go for a sunset coral palette that blends peach to guava to deep coral, add a thin gold line like the last light on water, and keep the board sandy with a dusting of toasted coconut. Finish with edible tropical blooms—real food-safe hibiscus or nasturtiums, pressed petals, or candied pineapple “flowers” set in clusters—and if you must use non-edible stems, wrap and anchor them like you mean it.
Hibiscus and Palm Accents
Sun‑washed hibiscus blooms and glossy palm fronds turn a bachelorette cake into a beach postcard you can eat, all color and breeze without the sand in your shoes. Stack the vibe, not the sand. Layer big petals, angle fronds, and keep edges crisp. Use Fondant Cutouts for bold hibiscus, then pipe Royal Icing veins and dots so the greens read fresh. A swipe of edible dust makes leaves catch light. Keep flavors bright—lime or coconut—so the look matches the bite. Picture it now:
- A tall tier wrapped in palm, hibiscus tucked.
- Sugar dew on petals, like early warm beach air.
- Slim bamboo band, neat and steady around base.
- Wafer-paper fronds that sway when you carry, gently.
- Clean topper—her name in cool driftwood script, centered.
Sunset Coral Palettes
Even with the music loud and the plans louder, a sunset coral palette quietly steals the show, all warm glow and easy charm that flatters every beachy bloom you park on the tiers. You start with peachy neutrals as the base, then sweep in ombre gradients from soft shell to ripe papaya to deep coral, so the cake looks like the sky right before sundown. Keep the finish mostly buttercream, smooth with a few spatula waves, like sand after a tide roll. Add a thin rose-gold edge on each tier, nothing flashy, just a wink. Ask your baker for a color swatch so napkins, candles, and dresses don’t fight it. In photos, warm light wins, so angle it near sunset. It travels well, too.
Edible Tropical Blooms
That coral glow sets the stage for edible tropical blooms that actually taste good, not just look beachy, so think hibiscus petals for tart ruby pops, butterfly pea blossoms for that ocean‑blue wink, and peppery nasturtiums in mango and tangerine that play nice with buttercream. You can mix real petals with Orchid sugarcraft so guests get flavor and drama, not chewy décor. Ask your baker for Tuberose detailing along the borders, it smells dreamy and looks clean.
- slick hibiscus glaze dripping like sunset on warm sand
- tiny butterfly pea cubes turning frosting sky‑blue as they melt
- crisp nasturtium leaves holding little lime salt sprinkles
- wafer‑thin orchid frills curled over coconut shards
- tuberose buds tucked into ribboned seams for a soft lift
Serve right away.
Boho Pampas and Palms
Pampas plumes and palm fronds set the tone for a boho bachelorette cake that feels easy, breezy, and a little wild in the best way, like a backyard hang where someone lit citronella and passed the good plates. You pair sandy buttercream with rough spatula lines, then tuck in pampas toppers and fan palms, and it glows. Think low, wide tiers for stable stacking, plus dried citrus slices for glow. Keep the palette sun-faded: clay, latte, oat. Ask your baker for boho silhouettes, not fussy petals, and make sure the stems are sealed and food-safe. If you need a budget save, use one hero spray and let the texture do the talking.
| Element | Why it works | Quick tip |
|---|---|---|
| Pampas toppers | Add height and motion | Use dried stems, food-safe picks |
| Fan palms | Give strong boho silhouettes | Angle by the top tier |
| Terra accents | Keep it grounded | Try clay-hue buttercream |
Disco Ball and Iridescent Shine
You want that dance-floor sparkle, so you cut tiny silver fondant squares and tile them like a mirror ball around a tier, press them on with a dab of edible glue, and keep the lines straight so it reads shiny not messy. Then you brush on holographic luster dust over smooth buttercream or fondant, just a thin coat, and check it under your phone’s flashlight to see the color shift from pink to green to blue, like a late-night wink. Put the mirror-ball accents low where hands won’t bump them, and save the luster dust for broad panels and a topper, because that’s where the light pays off most.
Mirror-Ball Fondant Accents
How do you make a cake feel like the dance floor shows up on a plate? You build mirror-ball fondant accents that catch eyes and set the beat, and you do it with simple steps. Roll fondant thin, chill it, then use mirrorcraft tools and sugar molding tricks to press a grid, cut tiny squares, and set tidy tiles around a tier with a dab of piping gel. Paint edges with edible silver paint for shine, not glare, like chrome at dusk. Add few mini balls on skewers, let them spin, and room perks up, no playlist needed.
- tiny tiled bands hugging the base
- a floating mini ball topper
- neat silver-edged seams
- sleek tile clusters on corners
- a marching line of tiny micro squares
Holographic Luster Dust
Catching the room’s light and tossing it back in rainbows starts with holographic luster dust, the stuff that makes a plain tier flash like a tiny dance floor when the DJ hits play. You’ll get the sparkle if you dust it dry over fondant, or mix a pinch with high-proof alcohol and paint smooth stripes and edges, and it sets fast so smudges don’t stand a chance. Chill buttercream first, then brush lightly, because soft frosting grabs and clumps, and that never looks chic. Buy food-grade dust from a vendor that shows testing compliance and batch numbers, since “non-toxic” craft glitter is a hard no for eating. Keep jars sealed, cool, and dry for storage longevity, and label shades so reorders stay simple later.
Retro Y2K Pastel Pop
Flip phone sparkle meets cotton-candy skies in a Retro Y2K Pastel Pop cake, the kind that looks like a Lisa Frank notebook grew up and learned good manners. You want Y2K nostalgia without the mess, so you lean on Pastel gradients, soft lilac into mint into sky. Ask your baker for sharp edges, tidy piping, and textures that keep it cute, structured, and modern.
- translucent jelly hearts set like tiny phone buttons
- pearly dragees that twinkle like iced-out hair clips
- ribbon-frosted borders with micro stars tucked in
- edible vinyl decals of butterflies, cherries, and peace signs
- a flip-phone topper with a sugar screen that says “BRIDE”
Keep flavors bright and clean—strawberry milk, lemon cream, or vanilla bean—so the colors lead and the bite stays light. Box it cool, carry it flat, slice with a hot knife, and you’ll get neat layers and zero tears. Just clean slices. Promise.
Black-Tie Monochrome Chic
You set the tone with a noir-and-ivory palette, clean blocks of black and white that read like a crisp party invite and make every slice look sharp. Then you lean into tuxedo‑inspired fondant accents, think a neat bow tie, lapel lines, tiny shirt studs, and maybe a satin stripe down one tier like a well-pressed pant leg. Keep the shine tight with minimalist metallic details, a slim gold edge, a row of silver pearls, or a chrome cufflink dot here and there, just enough polish to wink, not to blind.
Noir-And-Ivory Palette
While black and white sounds simple, a noir‑and‑ivory cake can look rich and dressed to the nines, the kind that walks into the room and doesn’t need confetti to make a point. You lean into high contrast, keep the lines clean, and let matte finishes and dramatic silhouettes do the heavy lifting. Think buttercream smoothed like river stones, thin cocoa brushstrokes, and a single bold bloom that says, yep, you meant it.
- ink-black tiers stacked like vinyl records
- soft-ivory buttercream with chalky texture
- sharp white sugar shards catching candlelight
- inky drip as straight as a plumb line
- one white peony parked off-center
Order swatches, not guesses, and confirm black won’t stain. Keep décor spare, let space breathe, and transport level, cool, and slow home.
Tuxedo-Inspired Fondant Accents
Black lapels in fondant put the cake in a tux and it stands a little taller, like it knows the dress code. You map a clean V down the front, press sharp seams with a ruler edge, and let the white shirt panel peek, neat as Sunday. Add a stout Bow Tie that sits centered, not floppy, and cut tiny buttons with a piping tip so they match. Tuck a fondant Pocket Square at a tilt, just enough to look cocky, not loud. Keep your lines crisp and your corners squared, like good shoes after a polish. When you order, ask for matte black, squared lapels, and hand-cut details, and request photos of a sample panel, because proofs save headaches and timelines in writing.
Minimalist Metallic Details
After the tux lapels and neat bow tie, it’s time to let a little metal catch the light, not steal the show. You’re going for black-tie calm with a spark, so use matte metallics like a whisper and leave negative space so each shine can breathe. Tell your baker exactly where the glint should land, like a cufflink, precise and simple.
- thin platinum brushstroke along one tier’s edge
- soft graphite leaf clusters at the base
- nickel-speckled sugar studs like tux buttons
- a single chrome wafer seal off-center
- faint pewter splatter under a satin ribbon
Keep flavors classic, box it in matte black, and you’ll get clean photos and calm delivery, bumps and all. Skip frills that bend or shed, they fight the sleek story.
Hot Pink Barbiecore
Because hot pink refuses to whisper, a Barbiecore cake leans loud in the best way, and that’s exactly what sets the tone for a bachelorette night that means business. You start with Fuchsia Layering, building tall tiers in gradients from neon to bubblegum, so every slice reads like a sunset at the mall parking lot, bright and a little wild. You nod to Barbie Nostalgia with sharp square edges, a bold cursive name plate, and a tiny fondant heel perched like it just stepped off a dance floor. You add glossy buttercream, mirror piping, and edible glitter that catches phone flash, because pics will happen fast. You keep the flavor modern, think strawberry champagne, or vanilla bean with dragonfruit curd, sweet but not sticky. Ask your baker for clean corners, sturdy supports, and a travel box that actually fits, because nothing kills the vibe like a slumped queen.
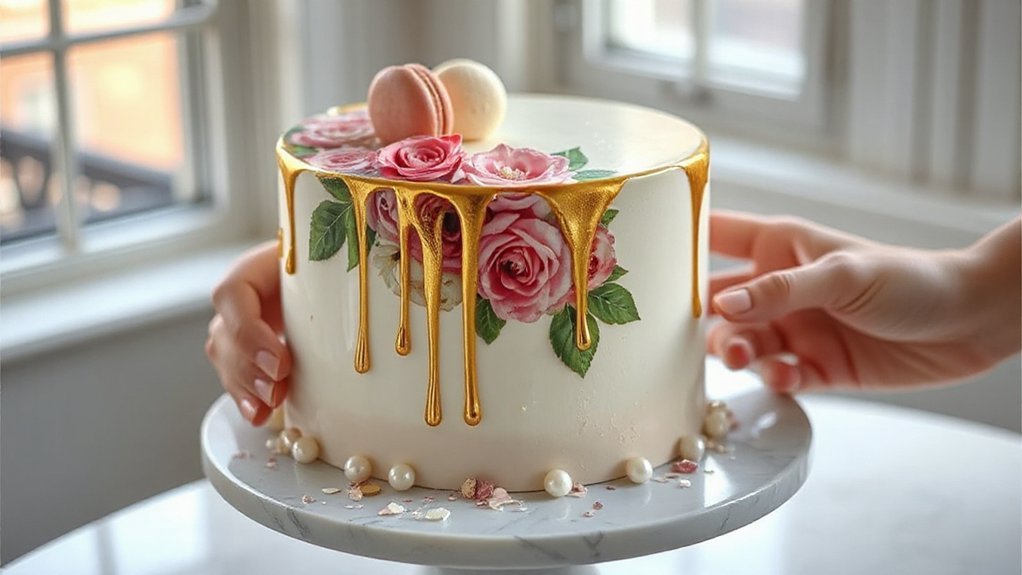
Edible Gold Leaf Luxury
You’ll get the best shine from edible gold leaf when you chill the cake, brush on a whisper of steam or a thin swipe of alcohol, then press torn bits with a soft brush or tweezers along the top rim, a fault-line band, or a clean stripe down one side. Place it where the eye lands first—cluster near a name plaque, a sugar flower, or the cake’s front edge—and leave some blank space so the gold can breathe, like jewelry needs skin. For color, pair it with jewel tones that carry weight—emerald buttercream, sapphire navy, ruby red, or deep plum—because gold pops bright against them and doesn’t get lost like it can with pastels, a lesson you learn fast after one “beige on beige” cake.
Application Techniques and Placement
While gold leaf looks fussy, the trick is simple: work on a chilled, slightly tacky surface, keep the air still, and handle it like it’s lighter than a secret. You’ll use small squares, a dry fan brush, and a steady breath, and you’ll plan before you touch the cake, because gold goes where it lands. Sketch placement grids on parchment, do quick balance mapping with your phone camera, and mark light guides with toothpicks. Nudge edges with a soft brush, never fingers, and seal with a mist of alcohol if needed. Then step back and edit twice.
- Broken vein from top to base.
- Flecks kissing the seam, neat.
- Bold cuffs hugging tier bases.
- Off-center patches framing the topper.
- One gilded shard on the back.
Pairings With Jewel Tones
After you’ve set the leaf where you want it, the fun is matching that shine to deep color so the gold looks rich, not loud. Go jewel tone by jewel tone: emerald buttercream makes gold read warm and luxe, sapphire ganache turns it crisp and icy, and ruby or merlot glaze gives you a classic, red-lip kind of finish that photographs like a dream. Keep the surface matte, think Velvet Backdrops, so the leaf pops; shiny on shiny just fights. Add edible garnets, like blackberries, figs, and dark macarons. Your Ribbon Choices matter too, so pick deep green silk or midnight velvet to frame the tiers, and skip glitter. If you want contrast, tuck one white sugar anemone, and you’re done. Clean, bold, modern.
Nude Palette With Dried Flowers
Choosing a nude palette with dried flowers sets a calm, sun-baked tone that flatters any bachelorette, whether you’re in a cozy backyard or a sleek wine bar, and it photographs like a dream under candlelight. You lean into earthy neutrals so the cake feels modern and quiet, and you anchor it with pressed blooms that won’t wilt halfway through speeches. Ask your baker for soft buttercream ridges, a sandy ombré, and a shape that’s easy to slice without a circus. Then layer in texture, not clutter, so the whole thing whispers chic instead of shouting cute. Picture these details while you plan:
Nude neutrals, pressed blooms, soft ridges—texture that whispers chic under candlelight
- Thin rice-paper ruffles catching light like linen curtains
- Bleached bunny tails tucked beside caramel drip edges
- Edible gold flecks sparingly, like dust after a long drive
- A low, wide tier that lands steady on a picnic table
- A simple acrylic topper etched with the bride’s nickname
Geode and Agate Sparkle
You want sparkle without glitter fallout, so you pick a cake with a sugar crystal geode cut into the side, jagged edges, deep jewel blues or purples, and a little gold leaf like a ring you found in a thrift tray. Then you layer in agate slice patterns across the tiers, thin ripples of color and clear lines, the kind you see on fancy coasters, so every slice looks like a polished stone. They photograph clean, and you’ll get easy transport if you box them tight, and guests get the small thrill of cracking into rock candy that tastes like citrus or berry, which beats scraping sprinkles off a plate any day.
Sugar Crystal Geodes
Rock candy geodes turn a plain cake into a little cave of sparkle, the kind that makes everyone lean in for a look before they even ask for a slice. You coax the shine with simple Crystal Chemistry, hot syrup poured and cooled till crystals set, then you tuck those gems into a neat cutout and seal the edges with buttercream and a gold flick. Mind Humidity Control, or the crystals sweat and slump, and nobody wants a soggy cave, trust me.
- deep midnight blues with a flash of gold
- blush pink crystals in a tidy heart
- smoky quartz grays, cool and grown-up
- neon citrus shards for a bold grin
- clear ice clusters, crisp as winter
Order early, pack snug, and keep it dry.
Agate Slice Patterns
After those crystal caves, agate slices bring the calm—steady rings like pond ripples, neat and a little mysterious, the kind that whisper “grown-up sparkle” without shouting. You’ll get shimmer, but it won’t holler. Ask your baker for layered watercolor on fondant to fake Layered Veining, then a thin gold edge so the light catches. For more pop, use isomalt windows set into panels, with Organic Contours that wiggle like real stone. Pick two or three hues, not ten; teal, smoke, and blush play nice. Place a few big slices as a topper, and tuck smaller chips down the sides like skips of a stone. Order early, since drying takes days, and carry it flat; those crisp rings can crack if jostled on the ride.
Acrylic Toppers and Custom Fonts
Choose a crisp acrylic topper and a custom font to give the cake its voice, clear and loud without shouting. You want message to read easy from across room, so mind Font legibility first, then style second, like boots before fringe. Acrylic durability means the topper won’t warp in the fridge or bend in a car ride, and you can stash it for keeps later, scuffs and all. Pick a font that matches her vibe, not the trend feed, and ask your baker for a quick mockup, because seeing letters on the cake’s size tells the truth. Keep strokes bold, avoid hairline swirls, and leave breathing room so frosting doesn’t crowd words.
- frosted glass-clear acrylic catching candle flicker
- matte black script casting a crisp shadow
- chunky sans serif riding a wafer paper ribbon
- rose gold mirror letters perched like sunglasses
- tiny heart dotting the i, steady not fussy
Confirm height, stake length, and placement, and carry a spare, because parties move fast and hardware gets lost.
Champagne Bottle and Bubbles Motif
You want that pop and fizz to read from across the room, so start with edible bubbles that look real, like clear isomalt spheres, light gelatin balloons, or tiny royal icing dots brushed with pearl dust and stacked in little trails up the side. Keep the bottle simple and bold, then add a popped cork topper made from light gumpaste or modeling chocolate, dusted with a touch of cocoa for that cork look, set on a toothpick or skewer so it stands steady at a tilt. For extra motion, wire a few small bubbles behind the cork like a burst, and keep everything light so it won’t tip the cake, lesson learned the hard way.
Edible Bubbles Techniques
How do you make bubbles you can eat that actually look like they floated up from a popped champagne bottle? You build them two smart ways, Isomalt spheres for glassy shine, and Agar spheres for feather-light float, then stage them so they rise in a loose swirl.
- Warm isomalt, pull a small bead, and blow gentle through a pump to shape clear globes.
- Temper the globes with a cool fan so they set fast and keep their round.
- Cook agar, drip it into cold oil, and sieve out tidy pearls that sparkle.
- Brush bubbles with pearl dust, a little gold, and a dab of clear alcohol for gleam.
- Anchor small to big along the bottle’s neck with royal icing, like a rising trail.
Done.
Popped Cork Toppers
With the bubbles sorted and sparkling, the scene needs its exclamation point—the popped cork that tells the whole story at a glance. You want a topper that looks mid-celebration, so set a sugar bottle at an angle and let fondant fizz arc upward. I like light wire inside the foam cork, because Popper mechanics matter when guests lean in. Use candy pearls for the splash and a tiny LED for a blink of sparkle. Skip heavy gum paste. Choose Reusable designs—food-safe acrylic corks you can wash and keep, because keepsakes beat crumbs.
| Tilted bottle | Anchor with a skewer in a straw. |
|---|---|
| Flying cork | Glue to wire, hide with fondant. |
| Bubble trail | Mix sizes; stack with royal icing. |
| Spark point | Tuck a micro LED behind sugar shard. |
| Keepsake swap | Use acrylic cork now, sugar later. |
Lingerie-Themed Elegance
Even if the group’s a mix of shy and bold, a lingerie‑themed cake can lean elegant, not bawdy, and still nod to the fun ahead. You steer the look with clean lines, soft shades, and little clever trims, so the cake feels dressed up, not overdone. Think Silk Draping over smooth fondant, with Lace Appliqué that catches light like a whisper, and you’ve got detail that reads couture, not costume. Pick flavors that feel plush, then let the finish carry the wink.
Elegant lingerie‑themed cake: clean lines, soft shades, silk draping, lace that whispers couture, a wink in finish.
- Satin ribbon borders that frame each tier
- Sugar corset lacing, neat and not cheeky
- Blush-to-ivory ombré, soft as evening light
- Tiny pearl studs, spaced like careful stitches
- Edible tulle ruffles that float at the base
Tell your baker the bride’s vibe, plus two do-not-cross notes, and ask for a sketch. You’ll get polish, a sly grin, and slices that feel special without stealing the moment tonight.
Margarita and Citrus Fiesta
While the music warms up, a Margarita and Citrus Fiesta cake sets the tone like sunshine you can slice, bright and a little salty, the way a good first toast should be. You start with a lime-kissed sponge that drinks a splash of tequila syrup, then layer in tart curd and a soft cloud of vanilla-lime buttercream, because balance keeps folks coming back for seconds. Ask your baker for Salt rimmed accents made with coarse sugar and flaky sea salt, brushed along the edges so every slice winks like glassware. Work in Citrus zesting right at plating, a fast swipe of lime, lemon, and grapefruit over the top, so the oils bloom and the room smells like vacation. Add thin candied wheels, piped limes, and a neon brushstroke, nothing fussy. Keep the palette crisp—kelly green, sun yellow, white—and you’ll have a cake that photographs clean and eats cleaner.
Nautical Bash by the Bay
Brass anchors and crisp navy stripes steer this cake right into a Nautical Bash by the Bay, the kind of design that looks sharp on a dock table and still feels easy, like bare feet on old boards. You set the tone with harbor hues, deep blues and clean whites and a wink of brass, and the whole thing reads tidy but not stiff. Ask for fondant ropes that actually twist, a wheel topper that feels solid, and signal flags spelling her initials, because details matter when the wind kicks up.
- Thin navy bands hugging each tier like deck lines
- A brushed-gold anchor that scuffs just right
- Hand-painted signal flags with crisp edges
- Rope-textured borders, firm but not fussy
- A bold compass rose pointing due “I do”
Keep flavor clean and bright, think lemon or vanilla, and you’ll please the crew. Box it snug, docks aren’t your friend.
Rustic Semi-Naked With Fresh Berries
After all that dockside polish, you might want a cake that feels like a summer porch, easy and a little wild around the edges, and that’s where a rustic semi-naked with fresh berries comes in. You get thin buttercream that lets the crumb peek through, like wood grain after a light sand, and it tells folks this party breathes. Ask your baker for layers that lean tart to sweet, lemon with vanilla, or almond with strawberry, then top with blackberries, raspberries, and a few mint sprigs. Do a quick berry maceration with sugar and a squeeze of lemon so the juice runs glossy but not messy, and spoon it on right before serving. Keep the look loose, more farmstand presentation than showroom, and use a simple wood board or a galvanized stand. It photographs honest, it eats clean, and guests go back for seconds without fuss or speeches.
Bold Prints: Animal, Marble, and Checkerboard
How do you make the cake shout party without yelling? You go bold with prints that look lively and taste good. Start with animal patterns for a wink and swagger; use cocoa butter paint or fondant cutouts for spots and stripes. Marble brings swirling, moody shine, like satin in motion, and it hides crumbs and fingerprints, handy when the kitchen turns into a racetrack. Then punch it up with checkerboard contrast inside or outside, so each slice lands like a reveal, not a guess. Keep colors tight—two or three—and add metallic pinlines so the whole thing feels tailored, not loud.
- Inky zebra streaks with soft blush roses
- Espresso and caramel spots as leopard accents
- Black-and-ivory checkerboard contrast on the sides
- Charcoal-and-pearled vanilla marble, glossy as wet stone
- A slim gold edge that frames every pattern clean
Ask your baker for sketches and timing.
Tiered Statement Centerpieces
Showpiece-cake thinking starts with tiers that earn their height, not just stack for the sake of it. You build a centerpiece that reads from across the room, then rewards a closer look, so every layer has a job and a voice. Start with Structural engineering you can trust, like a straight dowel spine, offset separators, and sturdy boards, because wobble kills confidence faster than a melted candle. Decide your Visual hierarchy early: bold base, intriguing middle, whisper-light top, so the eye climbs without tripping. Mix textures that talk—glossy ganache against suede-finish buttercream, pressed florals paired with a mirrored spacer, maybe a sugar bow that nods but doesn’t shout. Play with negative space using tall separators, and let one color lead while accents earn their keep. Test lift points, mark slice paths, and pre-fit the topper, because the prettiest tier means little if you can’t carry it ten feet.
Single-Serve Mini Cakes and Cupcake Towers
Big tiers stop the room, but the party really runs on grab-and-go bites, which is where single-serve mini cakes and cupcake towers earn their keep. You want treats that move with the music and fit in one hand, so folks can toast, wander, and nibble without hunting a plate, and that’s why these little builds shine. Order a tall stand, mix heights, and use Mini Sculpting to give each cake a tiny personality, like a wink on a dress hem, and you’ll watch trays empty fast.
Let the music lead—handheld minis and tall stands keep the party deliciously in motion.
- little cylinders wrapped in buttercream with sugar bow
- cupcakes stacked like a spiral staircase, steady and easy to grab
- petite domes stamped with initials, neat as a notebook
- metallic drips that catch the light, like jewelry under the disco ball
- Eco Wrapping in clear compostable film, tidy for travel and cleanup
Plan by hour, not headcount; pad twenty percent—late-night hands circle back.
Flavor Pairings That Wow
When you nail the flavors, the room goes quiet for a beat, then someone says, wait, what was in that, and that’s your green light. Start with a sure thing: dark chocolate cake, Salted Caramel tucked between layers, and a pinch of flake salt on top, so each bite hits sweet, bitter, and buttery, clean and bold. If you want bright, bake Earl Grey sponge and pair it with lemon curd and honey buttercream, which tastes like tea on a sunny porch. Go garden-fresh with strawberry and basil, a thin swipe of balsamic jam, and vanilla cream. Try coconut cake brushed with rum syrup, lime curd, and toasted flakes for crunch you can hear. Pistachio pairs kindly with rose and raspberry, not perfume, just gentle. Feeling playful, swirl peanut butter mousse with banana and pretzel bits. For heat, fold mango purée with chili-lime, calm it with yogurt frosting.
Sizing Guide by Guest Count
You’ve nailed the flavors; now you’ve got to match the cake to the crowd so nobody’s staring at crumbs or hauling home half a tier. Start with Serving Estimates; an 8-inch feeds 20, a 6-inch feeds 10, stack for 30, and a quarter sheet covers 25 quick. Run a Portion Calculator, add 10% for seconds and late RSVPs, and pick tall tiers for show or sheets for speed.
- Petite 6-inch topper, candles flickering, for a tight 8–10.
- Sleek 8+6 stack, modern and tall, for 20–30 hands.
- Quarter sheet, quick to cut, for 25 hungry night owls.
- Bold 10+8+6 trio, skyline vibe, for 45–60 with seconds.
- Cupcake grid, 1–2 each, easy grab-and-go between toasts.
Tell the venue you’ll cut coffee-size slices, not bakery slabs, and have two knives ready, one to steady, one to slice. That small prep keeps lines short, plates full, and the music rolling all night.
Budgeting and Cost-Saving Swaps
Let’s cut to it and trim the tab without trimming the fun: spend where guests taste it, save where they only see it. Put your money in moist layers and bold flavors; folks remember bites, not bow ties on frosting. Skip extra tiers and order a two-tier cake with a sheet cake, and you’ll feed the crowd without paying for bragging rights. Choose buttercream over fondant for a clean look that slices easy and doesn’t cost like armor.
Do Vendor negotiation like haggling a vintage jacket: ask for off-peak pickup or simpler décor to lower price. Try coupon hunting with bakery newsletters and apps, then stack savings with a cash pickup. Borrow a stand, don’t buy one, and use fruit or a sugar flower as focal point. Lock flavors early, avoid rush fees, and confirm serving count, because guessing high turns into leftovers you’ll haul home like bricks.
Dietary Needs: Gluten-Free, Vegan, and Nut-Free
Planning for gluten-free, vegan, and nut-free needs isn’t fancy; it’s hospitality with guardrails so everyone gets a slice without worry. You ask guests early about allergies and preferences, then craft a cake plan like a toolkit, using substitution strategies and tight cross-contact controls. Pick certified gluten-free flours, plant butter that bakes clean, and seed brittles instead of nuts. Tell the baker what must be avoided, and ask about labeling requirements on mixes and fillings, because labels save big nights.
- A snowy almond-free “white velvet” tier, frosted smooth like plaster
- Glossy ganache made with oat cream, poured like midnight paint
- Lemon poppy sponge with a snap, no wheat anywhere
- Salted caramel stripes, dairy-free but sticky and rich
- A tiny “VIP” cupcake box for the sensitive guest
Keep serving pieces separate, slice with a clean knife, and post signs, because clarity beats guesswork every time.
Timeline: Ordering, Tasting, and Deposits
Before the invites even go out, put the cake on a simple clock, because calendars don’t care about your group chat. Six to eight weeks out, you scout bakers, collect photos, and ask questions on servings, flavors, and budget. Five weeks out, you book tastings; most shops post tasting windows, so grab a slot fast, and bring one picky friend and one voice of reason. Four weeks out, confirm the concept and lock flavors, because change costs time.
Three weeks out, place the order and hit the deposit deadlines; pay fast, get a receipt, and note what’s refundable. Two weeks out, review the written order, double-check spelling and headcount, and colors. Ten days out, send final numbers and any allergy notes, keep edits light. One week out, check balance due and baker’s hours, set a reminder. Two days out, breathe; the cake’s in production, and you’re on track.
Delivery, Display, and Last-Minute Fixes
Even if the baker delivers, you still set the plan like a boss—who’s bringing it, when it lands, the route that skips potholes, and a backup if traffic turns mean. Text the drop window, share the entry code, and do quick Venue coordination so someone’s there with clear hands and a flat table, no guessing and no wobble. Ask the baker to photo the cake before handoff, then you match it on arrival, simple as a before-and-after.
Set the stage like you mean it, because display sells the whole moment and keeps the photos tight and clean. Bring an Emergency toolkit so small fixes don’t snowball, and keep your tone calm, because sugar behaves better when you do.
- White linen, ironed smooth
- A sturdy riser, six to eight inches, centered
- Soft uplight or candles, never harsh
- A sharp knife and extra plates
- Piping bag, spare blooms, food-safe tweezers
Heat-Proofing, Transport, and Storage Tips
You’ve got the drop handled and the table set; now guard that cake from sun, bumps, and sticky heat from porch to party. Pack it smart: box snug, non-slip mat under, cold packs on sides, never on frosting. Build chill into your plan with structural insulation—foam core under tiers and a board, so heat works harder. Park in shade, pre-cool car, and drive like eggs are in your shoes.
At the venue, aim for steady air and smart humidity control. Set the cake on a stand away from windows, vents, and speakers that thump. If it’s buttercream, keep it boxed in a cool room till last call for photos; fondant buys you time but still sweats. Wipe condensation with a dry paper towel, no rubbing. Store extras in airtight bins, labeled, then chill, not freeze. Let slices come to room temp, and they’ll taste like you meant it.